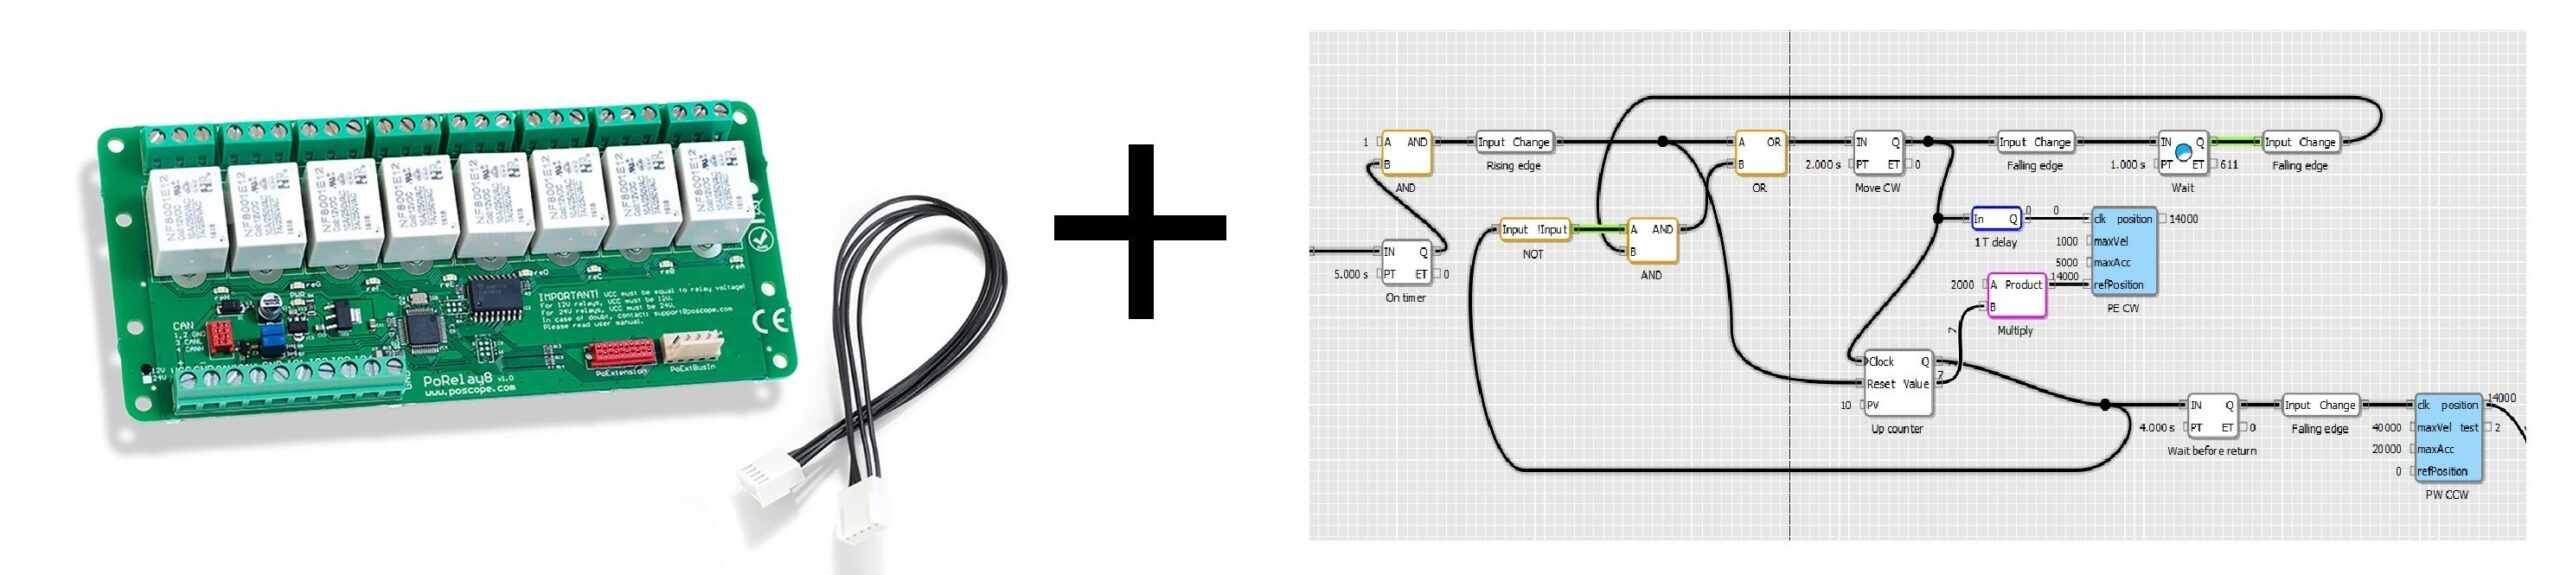
We present a giant upgrade for PoRelay8 devices, which unlocks the true potential of Smart relay PoRelay8 devices. We managed to implement the support for PoBlocks in our - now - programmable relay PoRelay8 devices.
We are not talking about setting the PoRelay8 outputs via PoKeys and PoBlocks, via Raspberry Pi or Arduino, but about presenting a true programmable logic controller built right into the PoRelay8 device. PoRelay8 devices can now operate on their own or implement signal conditioning in the device itself.
The upgrade is available for all PoRelay8 devices.
What are the new features and limitations?
The feature set of the PoBlocks for programmable relay PoRelay8 is determined by the peripherals of the PoRelay8 devices:
- 8 relay outputs
- 4 digital inputs
- virtual PoExtBus inputs
- standard set of arithmetic, logic operations, timers, counters etc.
- PID and On/Off controllers
PoBlocks for PoRelay8 also supports realtime debugging via Monitor mode.
Auto-start feature is available in PoRelay8 as well, allowing stand-alone operation of the PoRelay8 device.
Some PoBlocks features that are available in PoKeys57 series devices are not available for PoRelay8 due to hardware limitations, including analog inputs, PWM outputs, schedules, I2C/1-Wire/SPI bus communication, floating point math operations.
How do we install the update?
The upgrade is installed via the latest version of the PoKeys software, which can be downloaded from PoKeys v4.5.0 Configuration and PoBlocks (8.9.2021).
Step 1: Connect target PoRelay8 device to PoKeys57 series host device via PoExtBus cable
Step 2: Open PoKeys application, connect to your PoKeys57 device and open Peripherals > PoExtBus Smart…
Step 3: PoRelay8 device should be listed in the list as a Bridge device and ‘Update firmware’ option should be available in commands on the right (only Bridge device, which is connected to the PoKeys device via the PoExtBus cable, can be updated). Click ‘Update firmware’ and wait for the process to finish
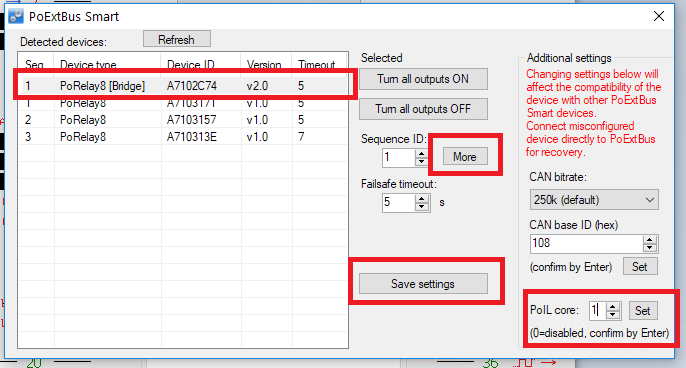
Step 4: Click ‘Refresh’, select the PoRelay8 in the list, click button ‘More’ for additional settings and set the ‘PoIL core’ to 1 or more. Make sure that you press Enter key if entering the number via keyboard. Press ‘Set’ next to the selection field and ‘Save settings’ to save the settings to non-volatile memory.
How do we use the programmable relay?
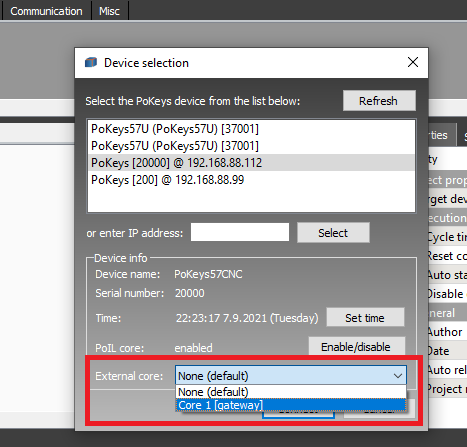
Once the PoIL core is enabled in the PoRelay8 device, use PoBlocks to access the device via the ‘Device selection’ dialog as shown below. The PoBlocks device selection dialog will automatically search for external cores on the selected PoKeys device.
Which are available blocks?
There are three IO blocks available for now – Digital input, PoExtBus virtual input and Digital (relay) output.
- Digital input: there are 4 digital inputs on the PoRelay8 device available (see PoRelay8 user manual). The inputs have built-in pull-up resistors – to activate the input, pull the input to GND
- PoExtBus virtual input: PoRelay8 device receives PoExtBus data from the PoKeys device and this block can be used to access it. One can access data for any of the 10 modules on the PoExtBus
- Digital (relay) output: there are 8 relay outputs on the PoRelay8 device. Once the output is configured to be used in PoBlocks, it is no longer updated via the PoExtBus data stream (until the next reboot of the device).
Some application examples
Standalone relay controller: since the PoRelay8 can run the PoBlocks code on its own (with AutoStart option enabled), it can be used as a smart programmable relay controller instead of a traditional PLC (programmable logic controller)
PoExtBus signal conditioning: by using the PoExtBus (virtual) input block, one can condition the signals coming from the PoExtBus host (e.g. add pulse time limitation or combine inputs and outputs)
Video demo
Look at the demo video below, try it out by yourself and let us know about your thoughts in the comments section below.
We also offer 48V version of PoRelay8 programmable relay.
If you need informations about Polabs – PoKeys product, here are some links:
- Stepper motor driver-complete explanation
- USB CNC Controller-PoKeys57CNC
- Homing sensor
- PCB tester – PoStep25-256
- Bipolar stepper motor driver – PoStep25-256
- 4th axis for CNC mill machine
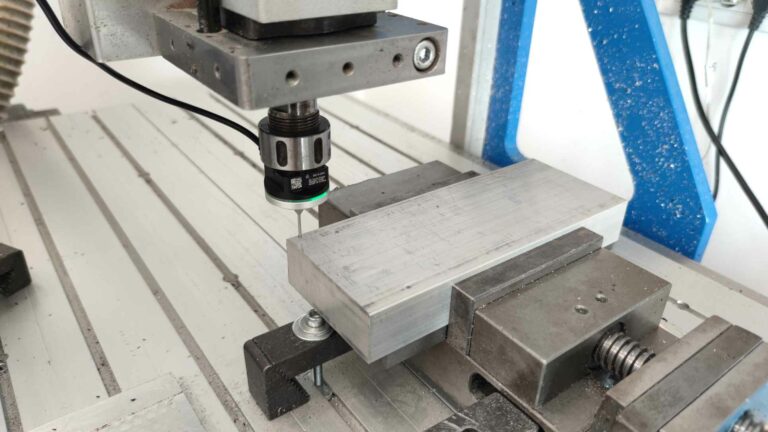
- Introduction to CNC hardware – electronics
- Plasma cutting equipment
- What is CNC plasma cutting
- CNC plasma floating head – Z-axis
Related Posts