This short tutorial will show you how to configure the PoKeys57CNCdb25 with Mach3 as an USB motion controller. We’ll go through plugin installation, plugin configuration and device configuration.

Installation
PoKeys plugin is automatically installed by PoKeys setup to C:\Mach3 folder. It requires .NET 3.5 to be installed on the PC prior installation.
Note: If the correct .NET framework is not installed, install the PoKeys setup, then start PoKeys application and the system should automatically download the correct version from the internet. Re-run the PoKeys setup.
Before using the PoKeys57CNCdb25 device, make sure that you have the latest firmware in the device. Start PoKeys software – the following dialog will appear
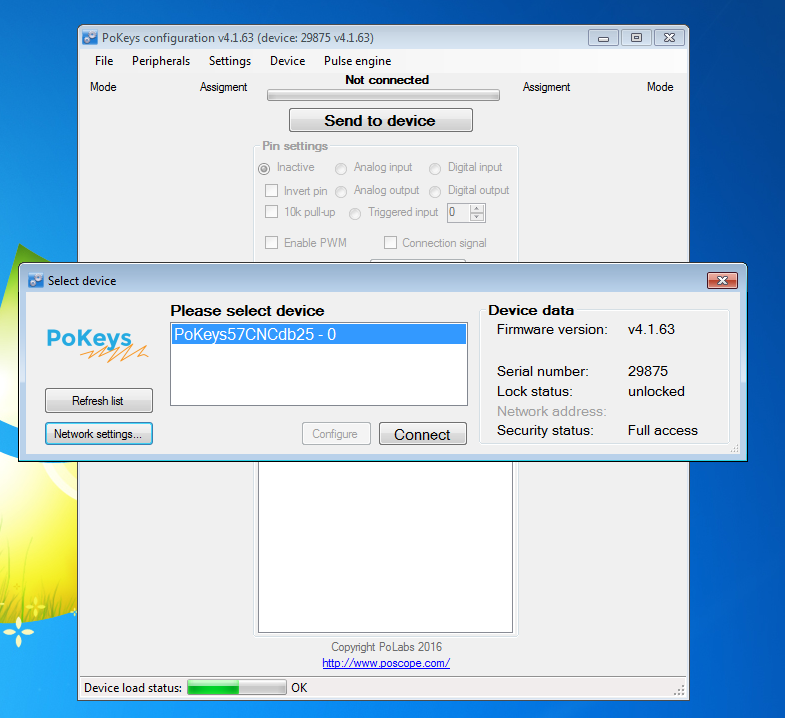
If the application detects older version of the firmware, the upgrade will automatically be suggested after clicking on ‘Connect’ button. Allow the system to upgrade the firmware – it the upgrade fails due to timeout, Windows might still be installing the device drivers and application has been waiting for too long. Just try the upgrade again after a few minutes.
PoKeys57CNCdb25 with Mach3 configuration
Start Mach3 and enable the PoKeys plugin – open the Config > Config plugins. Make sure that the PoKeys-PoLabs-v1.00 plugin is enabled as shown below.
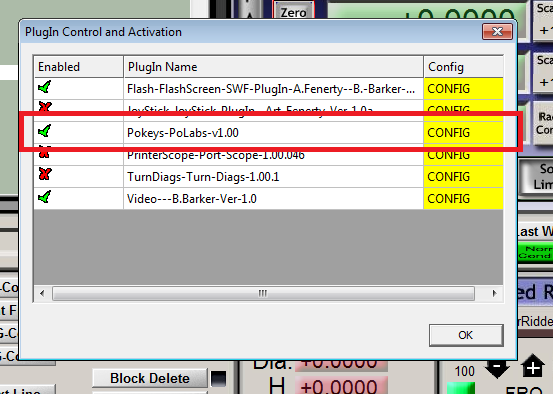
Note: If the plugin has not been enabled before, restart Mach3 after enabling it.
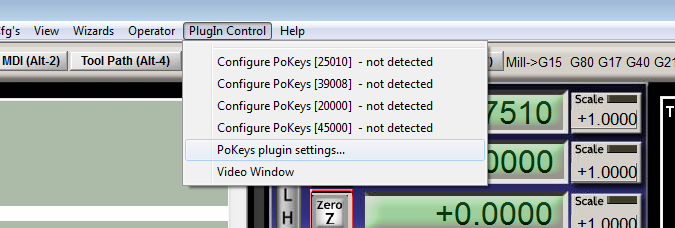
Find ‘PoKeys plugin settings…’ in the ‘PlugIn Control’ menu. This will open the plugin configuration dialog.
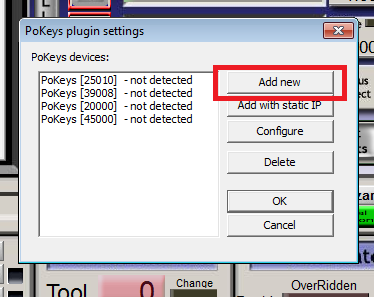
This dialog allows you to configure individual PoKeys devices in Mach3. Click on ‘Add new’ to start adding the new PoKeys57CNCdb25 device.
The list of available PoKeys devices will appear.
Note: if the device is not in the list, make sure the device is connected to the USB port. If the problem persists, make sure that the PoKeys setup has been run with the .NET framework present on the system.
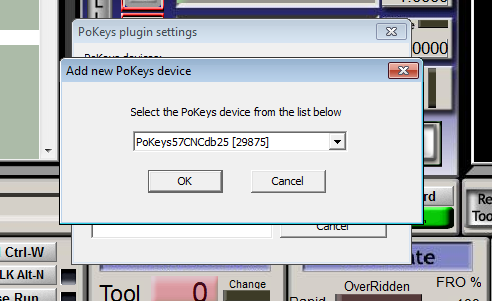
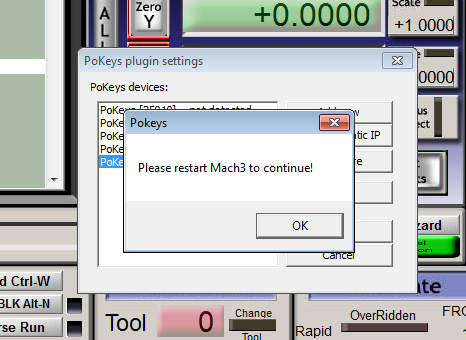
Clicking OK will configure the new PoKeys57CNCdb25 with Mach3. Make sure you follow the instruction and restart Mach3.
Configuring pulse engine of PoKeys57CNCdb25 with Mach3
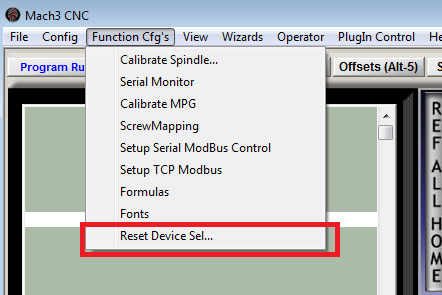
If other motion device has been used in Mach3 prior using PoKeys57CNCdb25, motion device selection must be reset by executing ‘Function Cfg’s > Reset Device Sel….’ in Mach3. Restart Mach3. On next restart select PoKeys as motion device.
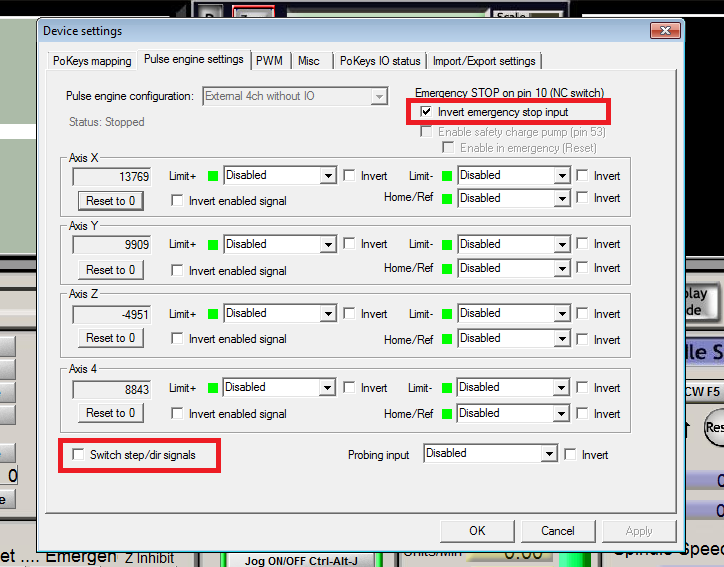
Check the operation of the emergency switch. If a NO (normally-open) switch is used, the polarity of the signal must be inverted. Open PlugIn Control > Configure PoKeys [serial], then switch to ‘Pulse engine settings’ tab. Check the ‘Invert emergency stop input’.
By default, PoKeys57CNCdb25 outputs step signals on pins 2, 4, 6 and 8 and direction signals on pins 3, 5, 7 and 9. If your CNC device has those signals switches, check the ‘Switch step/dir signals’ in the plugin settings, as shown below.
The basic device setup is now complete. You can map free PoKeys57CNCdb25 pins as digital inputs or outputs to different Mach3 signals (OEM LEDs, buttons). PWM outputs are available on pins 1, 14, 16 and 17 and are configured in the ‘PWM’ tab.
Please check some of our products:
- Stepper motor driver
- Stepper motor driver-complete explanation
- USB CNC Controller-PoKeys57CNC
- Homing sensor-PoHome1IRNPN
- Plasma voltage divider
- Bipolar stepper motor driver
- Plasma cutter troubleshooting guide
Related Posts