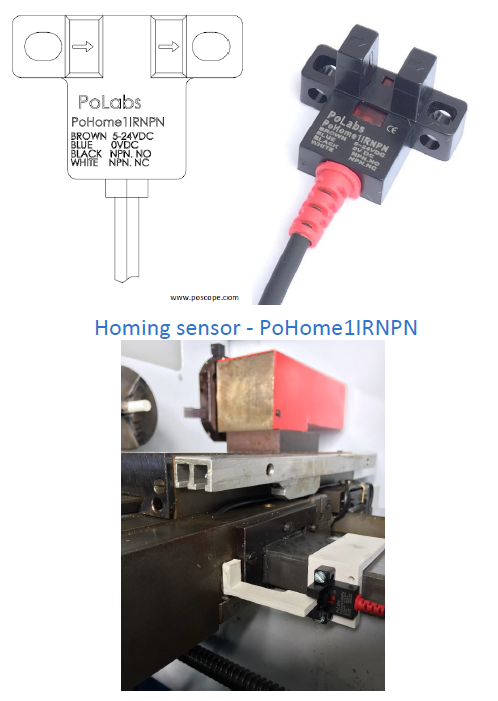
A blog article obout NEW PoLabs product – homing sensor – PoHome1IRNPN. Homing sensor is an high accuracy, repeatable and more reliable hardware. More about homing sensor is explained in this article.
Table of Contents
What is machine homing?
Machine homing is a CNC machine (automated) protocol – process, that returns the CNC machine to the Home (known) position which is accurate and repeatable. The homing process requires adding hardware (homing sensor to machine).
Machine homing gives a reference position of each axis, Homing position is used to allow for job fixtures and automatic tool changes.
Homing protocols – the process requires movement of each axis towards a sensor when the sensor gets a signal, the control software set a zero position on that axis. Zeroing an axis sets absolute machine coordinates to the (home) location. Home position is a starting point that the control counts out from. Every time you power up the machine make sure to make a home protocol.
How does machine homing with work?
Machine homing is one of the most important protocols – the cycle in the machining cycle. It is very important for accurate working and safe machine work. Because homing is important for indicate in machine home and safe position.
Homing works by moving the axis to a pre-defined position where we have a sensor/switch and using that location as the reference point, the controller can accurately know the position of the axis.
Once you have the hardware and pins assigned correctly, you will set your machine up for homing and “soft” limits, which limit the movement of the machine to safe locations after homing.
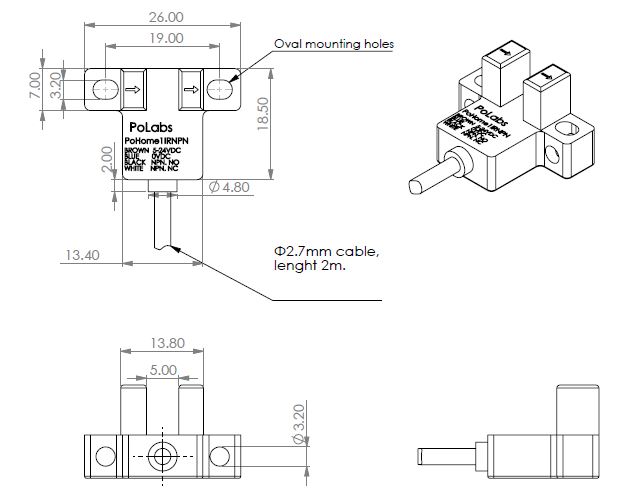
In the technical drawing below is a present homing sensor with dimensions and technical data.
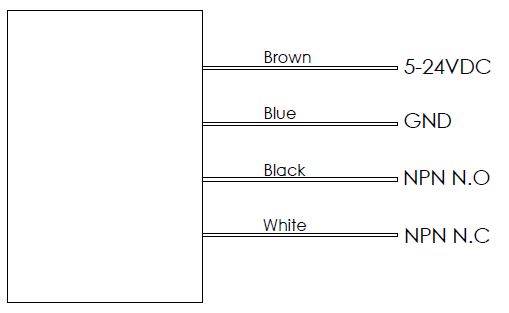
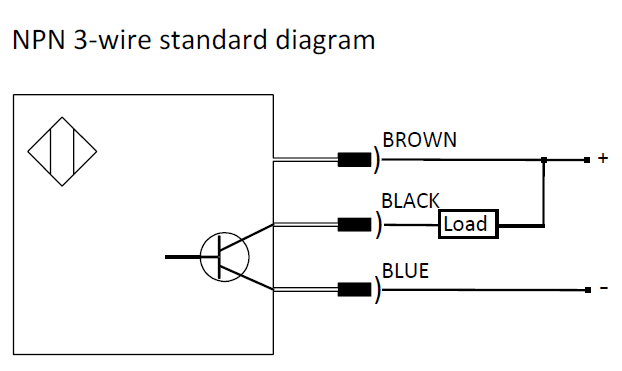
The homing sensor has an NPN sensor, Here is a standard wire diagram.
Installing homing sensor
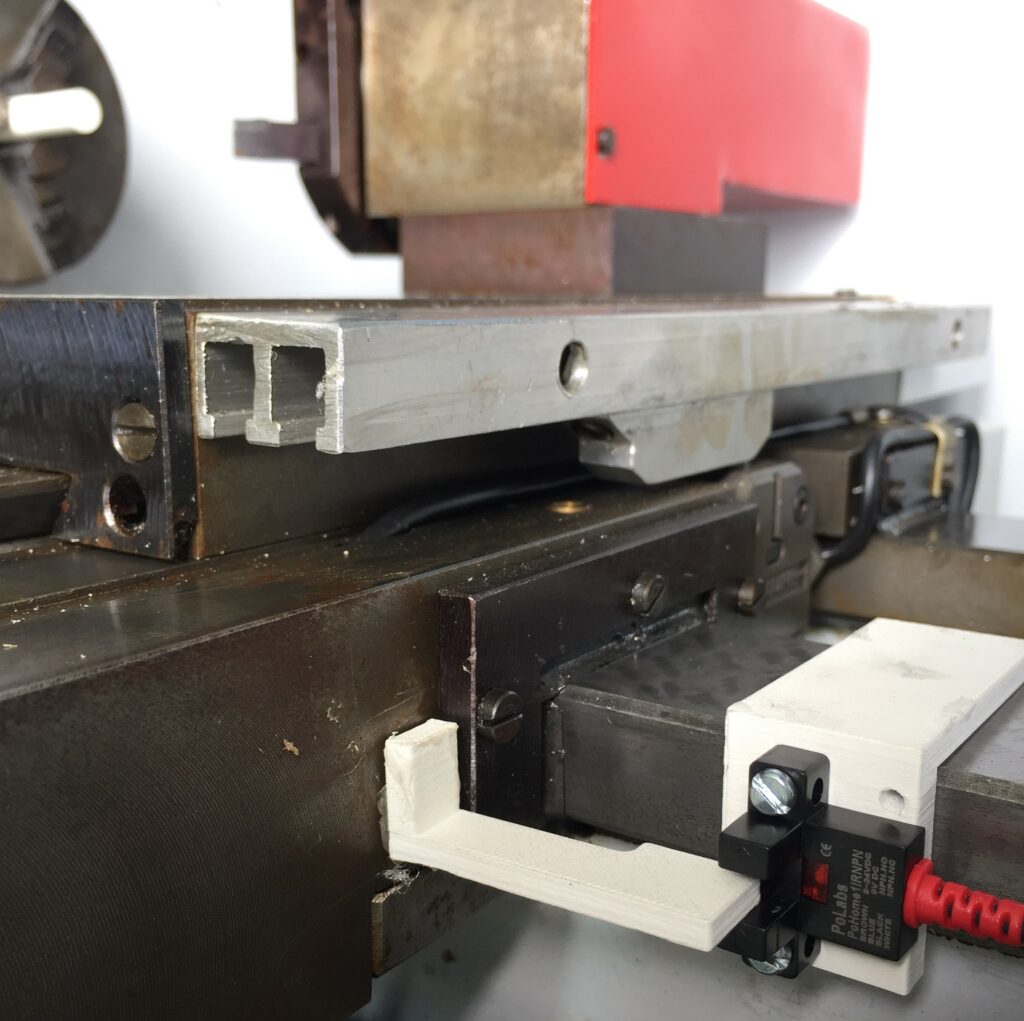
Homing your machine requires moving each axis towards its designated home sensor, so it is important to make sure your sensors are installed in the correct physical positions on the machine. To physically install your sensor, install the sensor on a solid body /surface and fiked it with bolts on the machine, make sure the sensor is installed solidly. The sensor has a 5mm detective distance, make sure the part which sensor sensing it (aluminum, plastic, steel) is fiked correctly and solid.
Before homing your system, we recommend verifying the pin assignments for all your sensors. This is best accomplished by a piece of metal, plastic to actuate each sensor while looking at the signal screen( Pokeys application – pulse engine). For example, is the photo below.
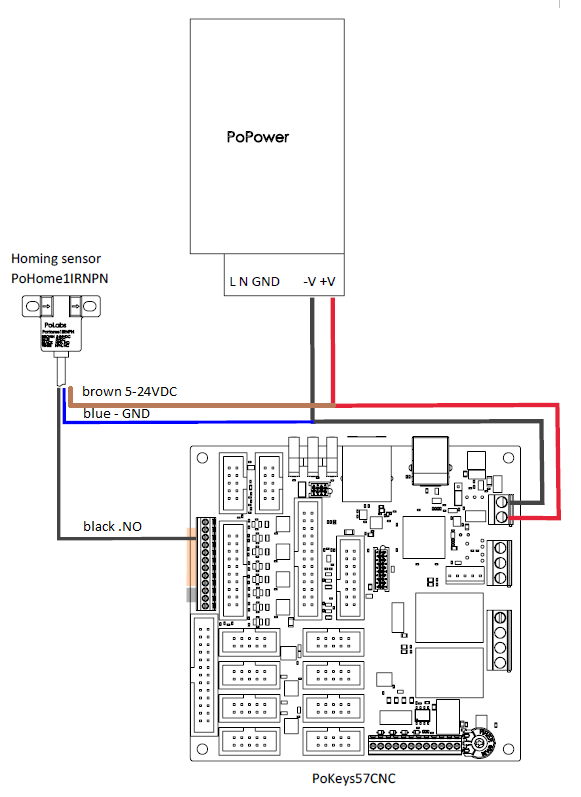
In the photo below – the wiring diagram is shown as an example of how to connect a Homing sensor to PoKeys57CNC. In our case, we connect, configure and test on a CNC lathe machine. Firstly we must add another power supply PoPower into the CNC controller box, Homing sensor is connected to an AXIS 2 switch(Lim+) Z-axis.
The sensor must be wired to a 5-24 V power supply that has a common GND to PoKeys57CNC device. Wire the output signal of the homing sensor (black wire) to target PoKeys home/limit switch input directly.
PoHome1IRNPN user manual
In the user manual for homing sensor – PoHome1IRNPN, you find proper information about specifications, features, sensor wiring, connecting to PoKeys57CNC device. It is important to read the user manual, for easier and better installing a PoHome product.
Configuration PoHome1IRNPN
Finally, we arrived to the last setting for the successful installing homing sensor.
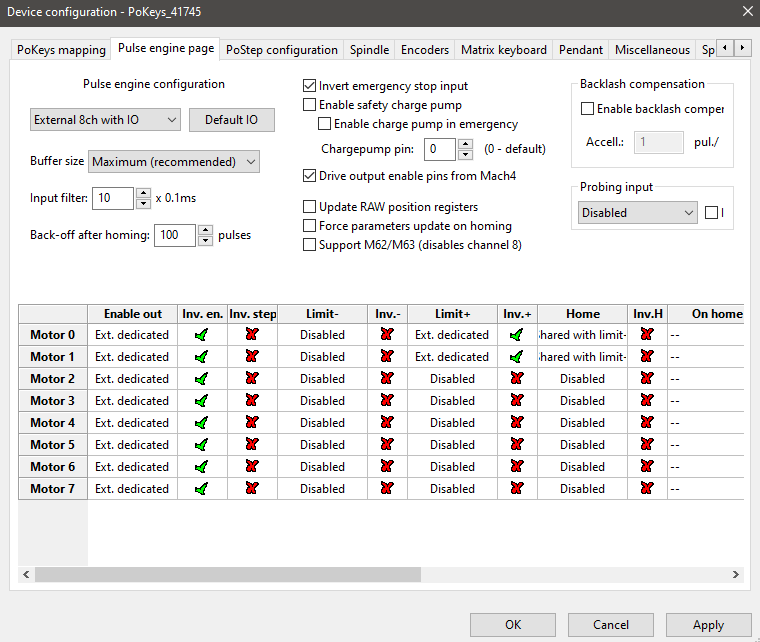
- PoKeys PlugIn settings:
- In our case we set CNC Lathe ( 2 axis setting – motor0, motor1)
Test protocols for homing sensor
During development, testing, and working on a new product, we test electronics in the electronics laboratory. We test it mechanically and electrically. Mechanically we test housing, homing repeatability, accuracy. During electrically testing, we test:
- IP rating: IP64,
- Operating voltage: (5-24 VDC),
- Sensor wiring (on PoKeys57CNC),
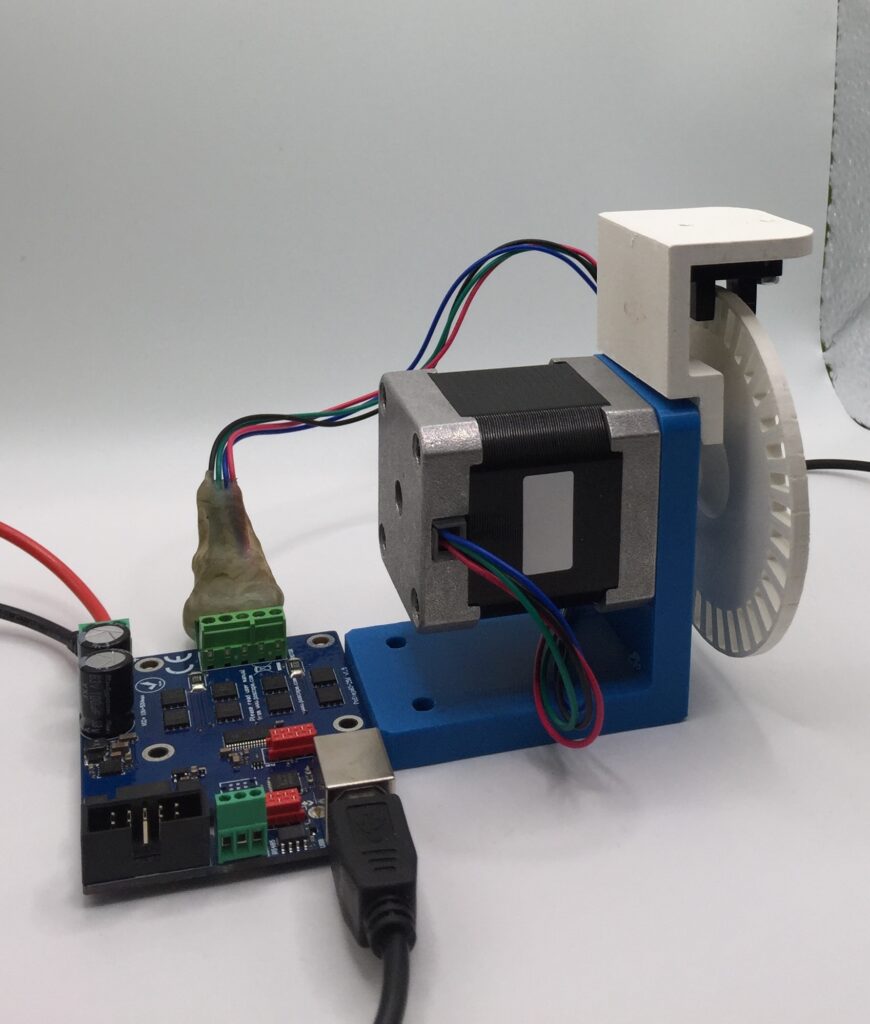
In the photo below, is present custom-made holders and test equipment for testing the homing sensors. Test equipment contains:
- Stepper motor driver (complete explanation)
- stepper motor NEMA17,
- Homing sensor – PoHome1IRNPN,
- 3d printed plastic holders,
- 3d printed wheel with slots,
- power supply,
- oscilloscope.
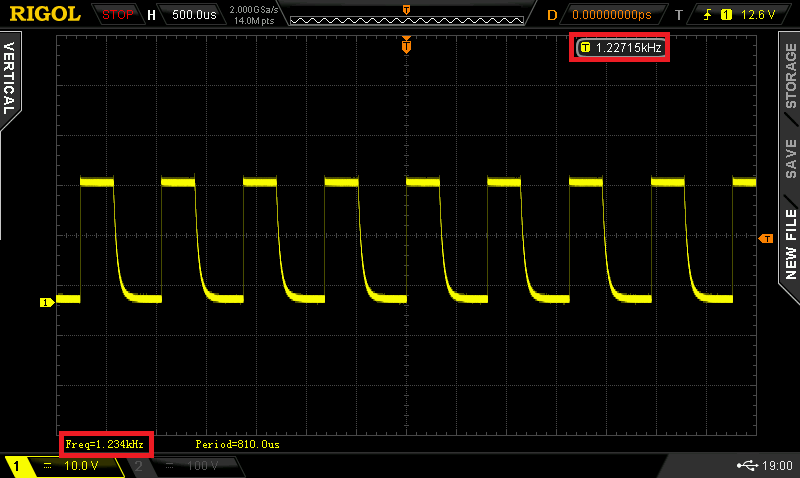
Wheel with slots is add on the stepper motor, with the intention to simulate the responsivity of Homing sensor. The homing sensor has responsivity – resolution over 1 kHz, in the photo below is a present measurement with an oscilloscope during testing.
Why Polabs team decide to develop homing sensor?
Polabs team decide to add PoHome1IRNPN into our shop for many reasons.
We and our customers have problems with mechanical end switches. So we decide to work on project Homing sensor and finally, there is a new product. Fully tested and used on our machines, also in PCB testing equipment devices (blog about PoLabs testing devices).
Our vision is to add some new product, which helps us and customers for better and more quality works. Quality mechanical (hardware) and software equipment is important for CNC machines or automation.
Benefits of Homing sensor from PoLabs
- Easy to mount,
- simple to connect on PoKeys57CNC,
- non – mechanical working principle,
- compatible with many CNC controller devices,
- more accurate and repeatable than mechanical end switches,
- wide operating voltage.
If you plan to make or your CNC machine or another machine/device, you can use a 3d model (for 3d model click the first link above, under download you have a STEP model). For easier working or inclusion of Homing sensor on the machine during the development/construction. In the phase of development/construction is very important if you can eliminate or solve problems because in construction is that much easier than later on machine or device.
More about
PoLabs web page.
Please check also our blog posts. It can help you to improve your machines or get some ideas on how to even make them better!
- Bipolar stepper motor driver – PoStep25-256
- PCB tester – PoStep25-256
- 4th axis for CNC
- Introduction to CNC hardware – electronics
- Plasma cutting equipment
- What is CNC plasma cutting
- CNC plasma floating head – Z-axis

