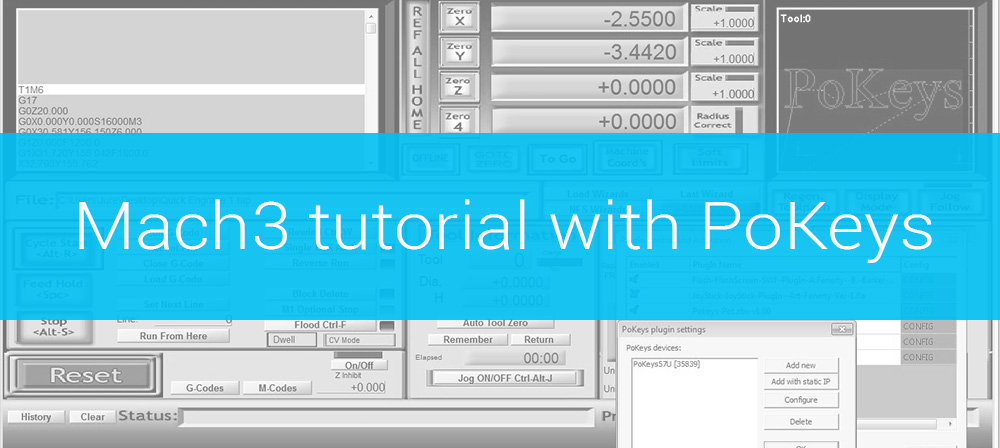
Introduction to Mach3 tutorial
This is the first Mach3 tutorial in a series of tutorials which will help you to know PoKeys devices and how to use them with Mach 3 software for controlling your CNC machine.
The tutorials will begin with simple configurations which will describe how to setup Mach3 and PoKeys plugin properly and then advance to more complex features that the PoKeys devices provide.
Installing software and drivers
All of the devices interface with Mach3 software via PoKeys plugin which is the same for all of the devices. The devices use USB or Ethernet connection to connect to the computer unlike older motion controllers which use parallel port.
First you should install the latest version of Mach3. When you have completed the installation download the latest PoKeys, PoBlocks and Mach3 plugin installation package (simply PoKeys setup package) from the product webpage. The installation package can be found under Downloads section.
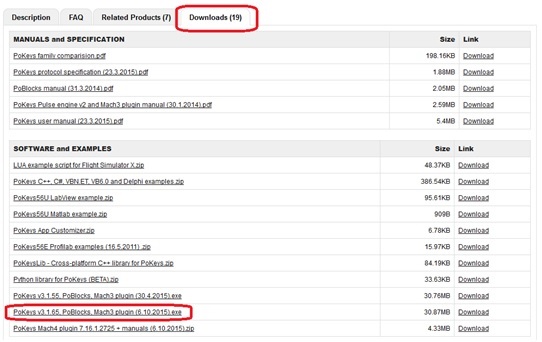
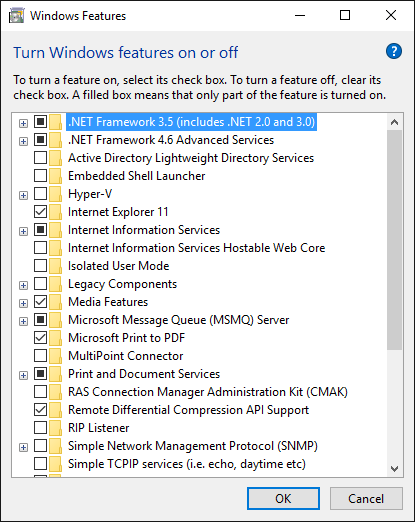
Windows 10 users: Before installing PoKeys setup package, go to ‘Programs and features’ dialog in Windows, click on ‘Turn Windows features on or off’ link and select .NET framework 3.5 in the list as shown below. Click OK to finish the installation.
Windows XP, Vista, 7, 8 users: Download .NET framework 3.5 from Microsoft webpage and install it (download link: https://www.microsoft.com/en-us/download/details.aspx?id=21).
Once .NET framework 3.5 is installed, simply start the installation of the PoKeys setup package and follow the instructions. For the purpose of this tutorial it is recommended that you select full installation. But a minimal requirement is that you install Mach3 PoKeys plugin.
Preparing PoKeys device
It is strongly recommended to update the firmware on the PoKeys device before continuing to assure that the latest version is installed. Connect your PoKeys device to the computer and follow the instructions in Getting started with PoKeys57CNC. The firmware update will be automatically suggested in older firmware is detected on the device.
If ethernet connection with the device is used, make sure that it is properly configured. Check the operation of any firewall software so that they pass the TCP and UDP traffic on port 20055. If DHCP is not used on your network (as in case of the direct connection), make sure that both your PC and PoKeys device have valid IP addresses setup (preferably in the class C IP space – 192.168.x.x with 255.255.255.0 subnet).
If you are planning on using kbd48CNC keyboard, consult the kbd48CNC user manual on how to setup the keyboard initially.
Close PoKeys configuration application. Only one application should access PoKeys device at the same time to avoid any crosstalk.
Mach3 plugin installation
Mach3 plugin will automatically be installed to C:\Mach3\Plugins folder. You may have to enable it the first time, as will be shown below.
First start Mach3 software and then in menu click the Config button and the Config Plugins.

When you click the Config Plugins option a window with all of the plugins should open. Then search for PoKeys plugin and click on the red cross to enable it. It should change to a green check mark.
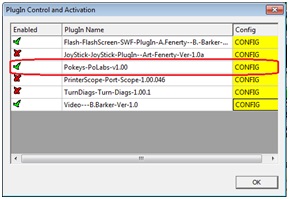
Now, click on CONFIG right of the PoKeys plugin name. The PoKeys plugin settings window should open.
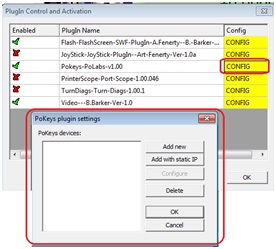
Then click on the Add New button. Now another window will open where you will select your PoKeys device. When the device is selected, click OK and then restart Mach3.

In this example the PoKeys57U device is used, but same also applies to both PoKeys57E and PoKeys57CNC.
Now that your PoKeys device is added you can start to configure the plugin to control stepper motors with Mach3. We will cover this in the next Mach3 tutorial.
You can find the next tutorial here.
Please check also our products and blog posts which can help us to improve our machines or get some new products.
- stepper motor driver.
- Bipolar stepper motor driver – PoStep25-256
- PCB tester
- Plasma divider
- 4th axis for CNC
- Plasma cutter troubleshooting guide
Related Posts