If you ever used a CNC machine you probably know how time consuming setting up the next job is. Mach4 probing significantly reduces set up time while being a very simple solution.
At the end of probing setup you will have only a few buttons to push to set up the next job.
Table of Contents
What is probing on a CNC machine?
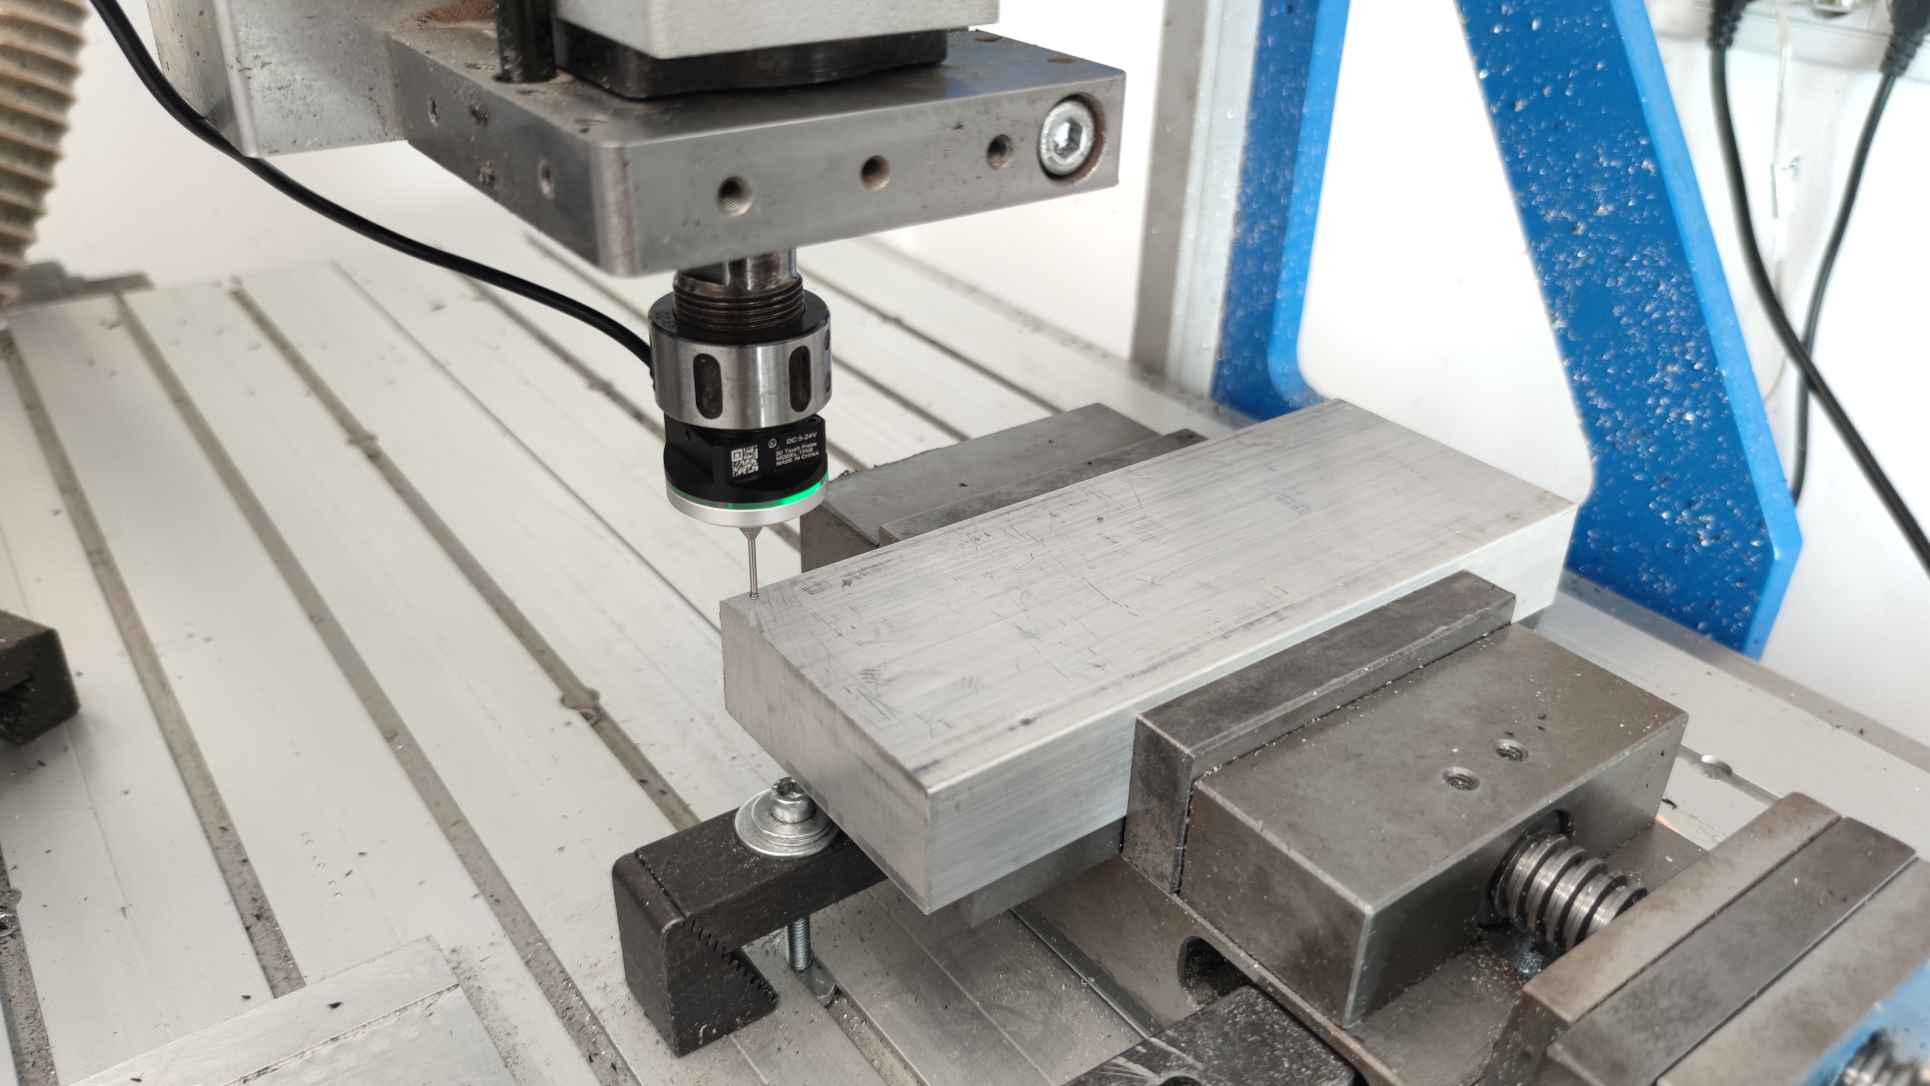
Probing is used to precisely locate parts and features on the CNC table or parts that you will be machining. The tool that does that magic is called a probe.
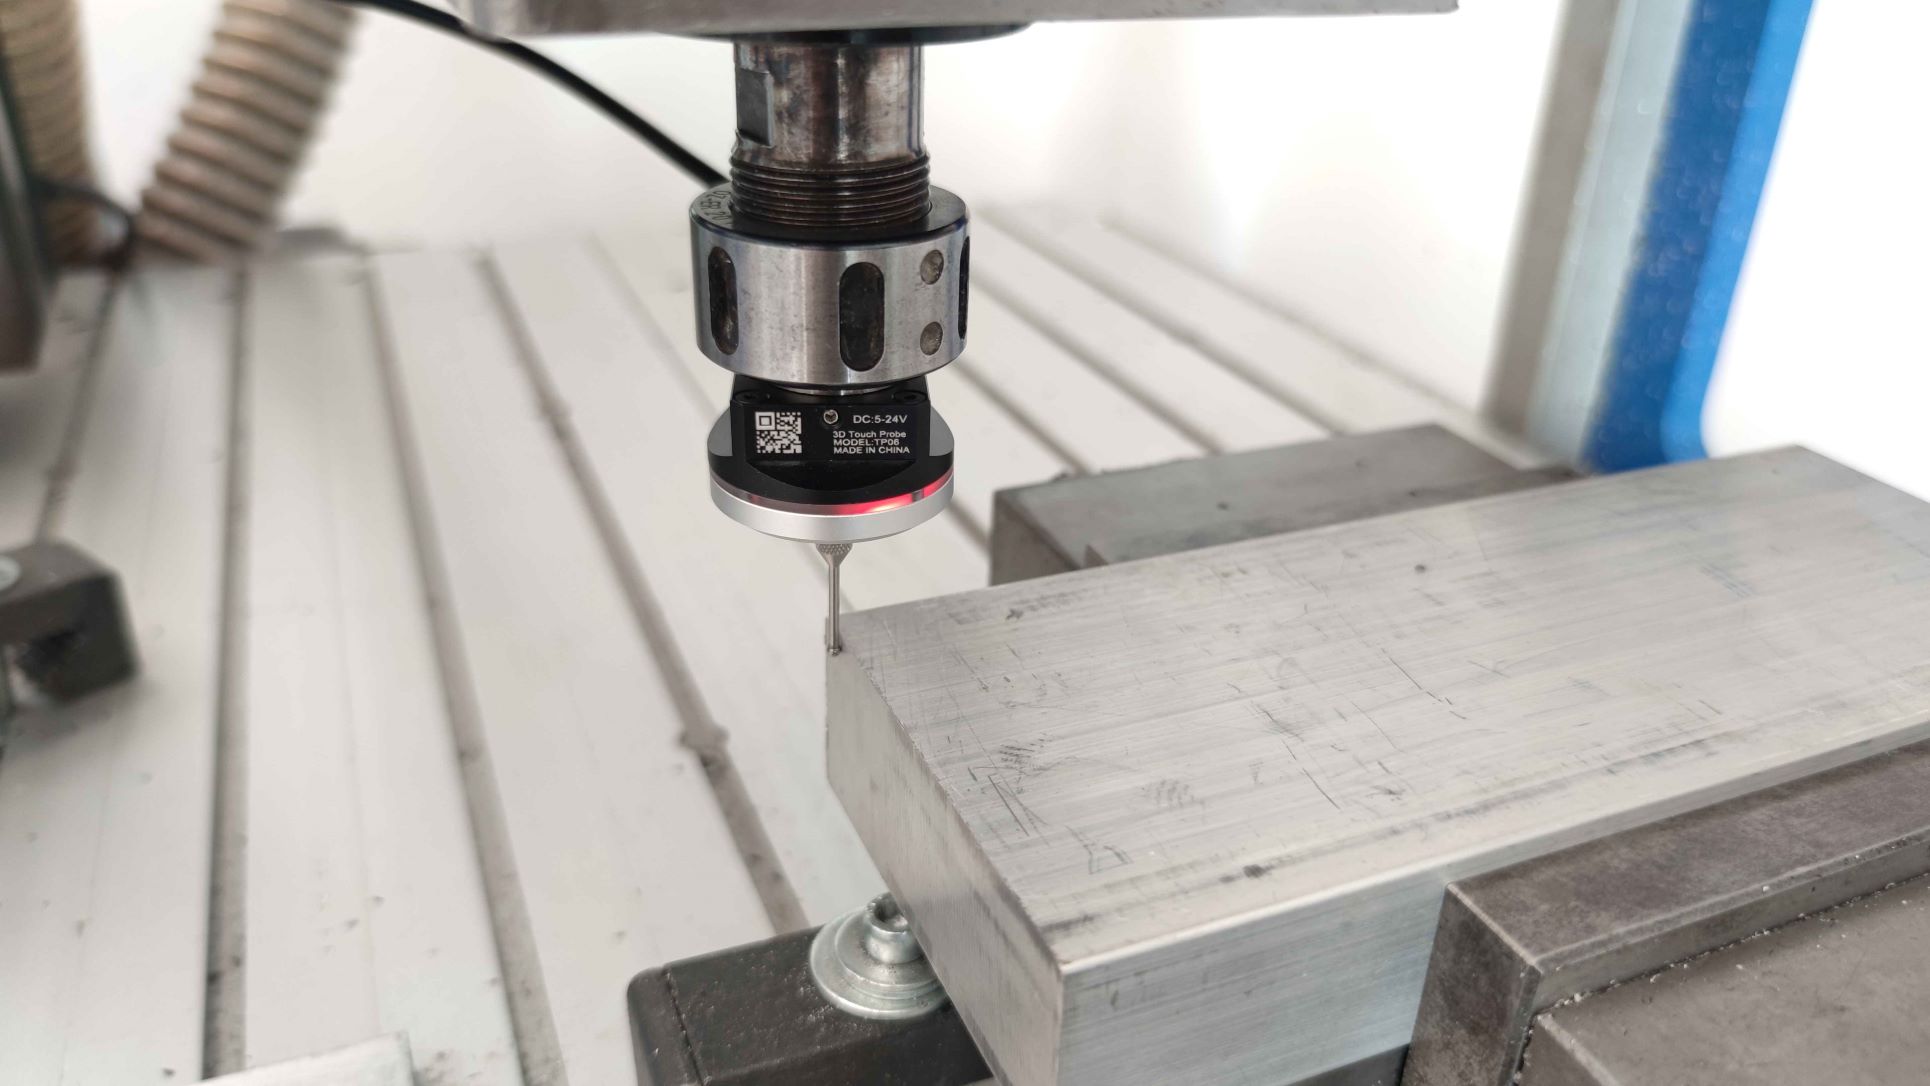
Probe consists of the body and the tip with a very precise ball on the end. The ball is what touches the surface and any movement of the ball triggers the signal to the controller, in our case it’s Mach4.
Probe is usually inserted into the spindle and connected to the controller that moves the machine while waiting for the signal from the probe. Once it receives the signal, the controller knows where the edge of the workpiece, vise or other feature on the machine is.
That way, you can probe one or multiple edges to set the zero point of the work coordinate system.
When programming toolpaths you always need zero point from which all the coordinates are calculated. It is of great importance that the physical zero point is the same as the programmed one so the part is in the right place regarding the physical material on the machine.
Probes used to be quite expensive and hard to buy but thanks to affordable prices from overseas you can easily get one.
Benefits of probing
- setting zero point
- check for broken tools
- adjust wear offsets
- measure features
- check that the workpiece is present
- calibrate the machine
While running production machining, you can check for broken tools, adjust wear offsets, but that is already very advanced Mach4 probing usage in our case. The most basic use is for setting zero point for your program.
Furthermore, you can also use the probe to ensure reliable production and also for measuring already machined features. You can check the dimension of the bore to ensure right dimensions and to adjust tool wear offset if necessary.
You can also check if the feature was machined correctly, for instance it is possible to check previously machined features before proceeding with finish machining to detect if the tool was broken during cutting and prevent even more broken tools down the line.
Probing also eliminates the possibility for human error if set up correctly. You can quickly mistype a dimension when setting up the part and ruin it. Mach4 probing automates that process and ensures that everything is set up correctly.
How to connect a probe with PoKeys?
The internal probe connection can be different for different manufacturers of the probe, since the output signal can be at HIGH level when triggered or at LOW level. Some probes already have internal pull-up or pull-down resistors.
In our case the probe already has an internal pull-up resistor and the output signal is at LOW level when triggered.
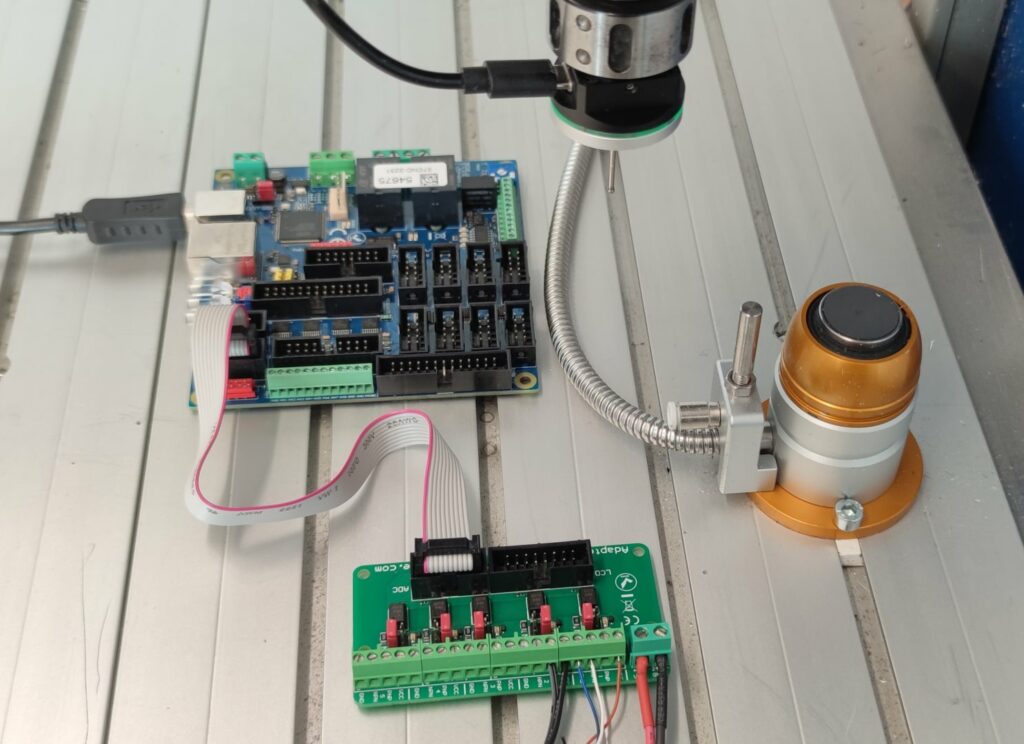
The configuration is very simple. On PoKeys57CNC we have a dedicated pin for probe input that is located beside the limit switches inputs. That is Pin 19 and is already configured as digital input by default for PoKeys57CNC.
It also has an internal pullup resistor on all newer boards, but for version 1.0, 1.1, 1.2 you need external pull-up or pull-down resistor to define the idle state of the pin. That of course depends on your probe. In our case, the probe also has a pull-up resistor in parallel with the one on the board but that is not the problem.
It is of great importance that the input signal from the probe does not exceed 5V since the probe input (pin 19) is a 5V tolerant pin with input filtering as described in manual. If you connect the probe to any other pin, please ensure that the input voltage does not exceed the maximum value for the given pin.
Our adapterPNPN and connection of PNP and NPN sensors
The easiest way to connect the probe is with AdapterPNPN. If you are using PNP or NPN probe or even if it is just a switch, connecting it to AdapterPNPN and PoKeys57CNC is only a matter of connecting a few wires and setting jumpers to the appropriate side.
PNP sensor’s signal wire should be connected to PNP input on screw terminal. It does not matter if sensor wire is NO (normally open) or NC (normally closed) contact. The benefit of NC wiring is that the error in circuitry and wiring is detected since the signal is not present. If for instance you cut the sensor cable, the error can be triggered. The jumper has to be set accordingly to the PNP side if using PNP sensor.
In case you use NPN sensor, you should connect sensor wire to the NPN input on the terminal, and set the jumper on the NPN side. Again, NO or NC wiring does not matter here, it is managed in the software settings where you can invert the signal if needed.
In case you are using ordinary switch contacts, you can wire switch between VCC and PNP terminal and set jumper to PNP. Or you can wire the switch between NPN and GND with jumper set to the NPN. You still have to connect power supply in order for the adapter to work even though switches do not need supply in order to function.
How to configure probing for mach4?
First of all, please ensure that you have the latest version of the Mach4 installed as well as the latest firmware for the PoKeys device, which you can update in the PoKeys application under “Device” -> “Upgrade firmware…”. Also install the latest PoKeys plugin in Mach4.
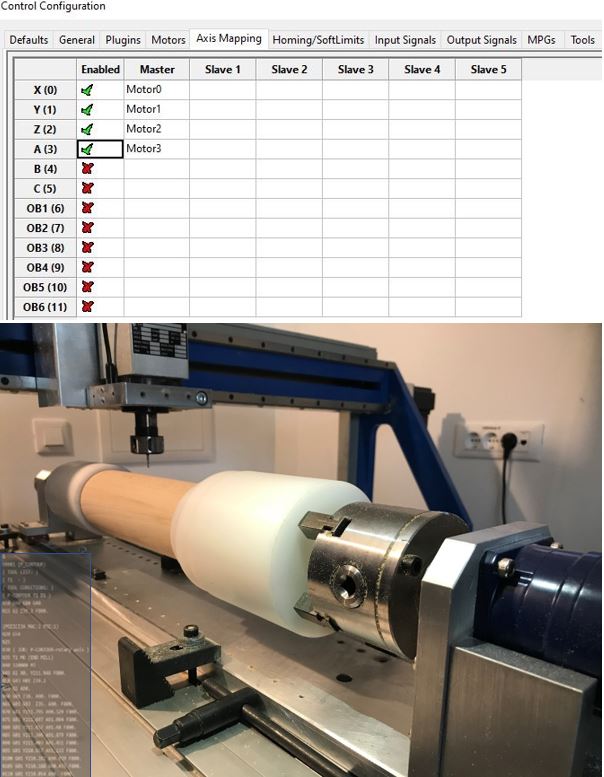
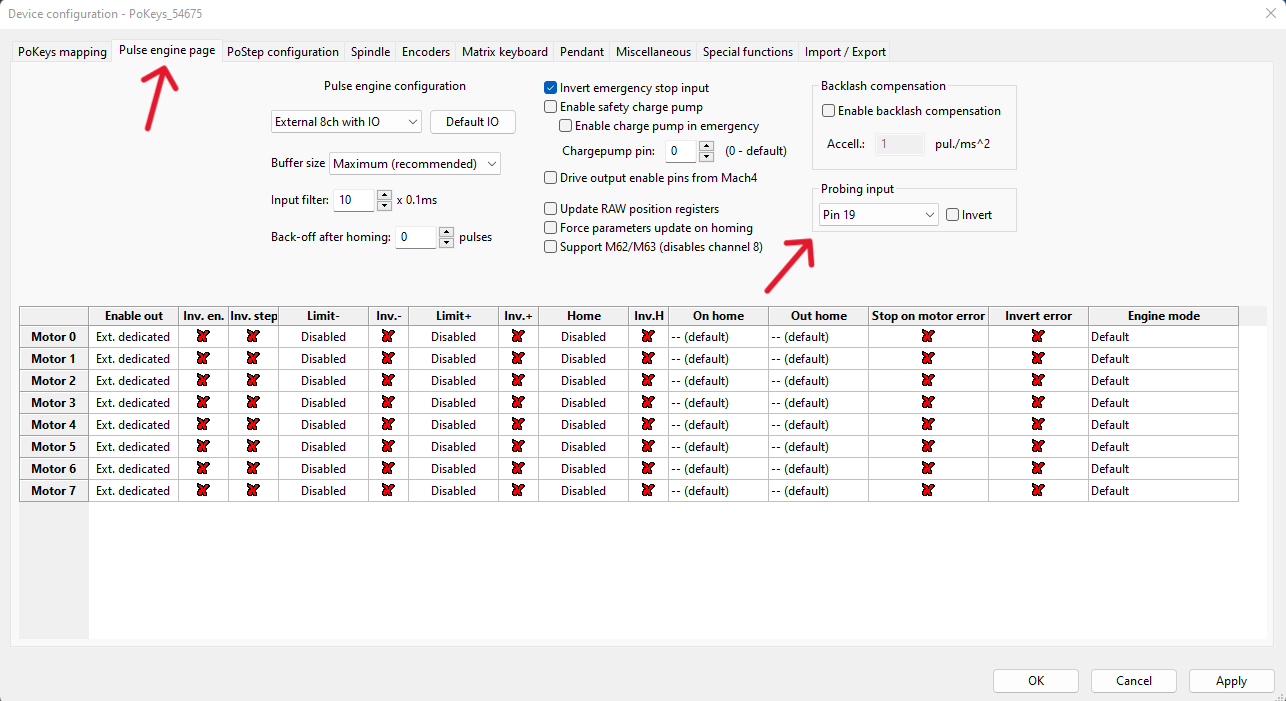
For configuring the probe to be used with Mach4, you can use a build-in plugin configuration in Mach4. Under “Configure” -> “Plugins…” -> “PoKeys plugin – PoLabs” you can select the device you are using and then click configure. Then under “Pulse engine page” you select the right pin for Probing input, in our case Pin 19. You do not need to invert the pin in our case.
That is all the configuration that you need for Mach4 probing. Apply the changes and test the setup.
You need to first enable the machine and under the “Tool information” on the default screen you can click on “Touch” and the new window appears. In the middle column the last black box tells you whether the probe is currently active or not.
The correct behavior is that one the probe is triggered, the black box should turn blue and display the active status of the probe. If you experience the opposite behavior, you need to go back to the settings where we configured the right pin and select the box which inverts the pin. Then test the behavior of the probe again as previously explained.
How do you probe a zero point in CNC?
Once you have configured the probe correctly and checked the operation and the reliability of the connection, you can start probing the surfaces. At first, it is recommended that you reduce the feed rates as much as possible. Then test the functionality manually to see if the Mach4 probing reacts as expected.
The feed rates can be reduced in the “Touch” window. If you are using the “Probing window” in the upper box, you can go in the last menu “Settings” and change the default setting to something you feel comfortable with for testing. You can always increase all the feed rates afterwards once you tested the operation.
It is also recommended to first calibrate the probe. You usually use a precise diameter ring gauge and perform the calibration routine that is set up in Mach4. That way your probe tip diameter is calibrated and value is stored for precise probing in the future.
For use in probing, you can select to only measure a feature or to set fixture offset G54. First one does not change anything and only displays the values in the Results window. The second one does change the G54 offset with the values of the probing cycle. That means that the offset that you probed will be valid for the next program that you run.
In Mach4 probing you have a lot of options including internal as well as external features. You can choose surface, circle, corner, angle etc. For each feature you have to set some initial values in the white boxes. That tells the machine approximately where to look for the corner/surface…
Are touch probes neccessary for CNC?
It is very common to use the CNC without probing capability. Many hobby machines as well as some industrial machines do not use probing since it is not always necessary. But once you start using a CNC a lot you can quickly wish you had that capability.
It is usually very time consuming to set up a CNC job without a probe.
You can set up the job for the machine without probing, and you can get very reliable results. But if you are frequently changing setups you will spend a lot of time setting up the job without probing. So depending on your line of work, probing can be very beneficial and save you a lot of time.
The machines that do not greatly benefit from probing are the machines that do repetitive work on the same parts and are running production work.
Another way to improve your efficiency and setup time is to add the cnc tool setter to your machine. It enables you to check the tool length automaticaly as well as check for broken tools during cutting for reliable production. In the blog post we also described the automatic touch off routine. You can use it to measure tools after you change them between operations and maintain the right z axis offset.
If your machine struggles with heavier cuts it is maybe time to do some maintenance and upgrades. The first sign of the cut that is too heavy is cnc chatter. We noticed on our machine that there was some room for improvement so we decided to upgrade the Z axis for better rigidity. The results are now better and we can take much heavier cuts than before without excessive vibration.
Difference between mach4 probing and mach3 probing
PoKeys setup is the same for both mach4 and mach3 plugins, but probing wizard is different in mach3. We recommend using the latest version of Mach4 with our product.
Sources:
1 – CNC Work offsets G54 to G59 How to use them
2 – More info about mach4 probing using the touch button
3 – Mach4 user manual
Related Posts