What if you run out of filament on the 24 hour print? Can your printer detect it and act accordingly? We offer and explain the unique solution with DIY filament sensor. It is reliable and can benefit you with making your printer better.
Understanding the importance of a filament sensor
Filament sensor is crucial component of your 3D printer that adds several benefits. One of the most important ones are:
- Prevents failed prints
- Saves time and material
- Improves printer reliability
- Automation with less human interaction
- Affordable option
Overall, filament sensor ensures print reliability and enhances the printing experience for the user. In case your 3D printer did not come with filament sensor preinstalled you can opt for DIY approach.
Why build your own DIY filament sensor?
If replacement part for you printer is not available or it is too expensive or you are building custom DIY 3D printer you can easily add DIY filament sensor. There are a lot of options, but our solution enables you to integrate our proven and reliable homing sensor. All you need is small 3D printed housing for the sensor.
What you need and how it works?
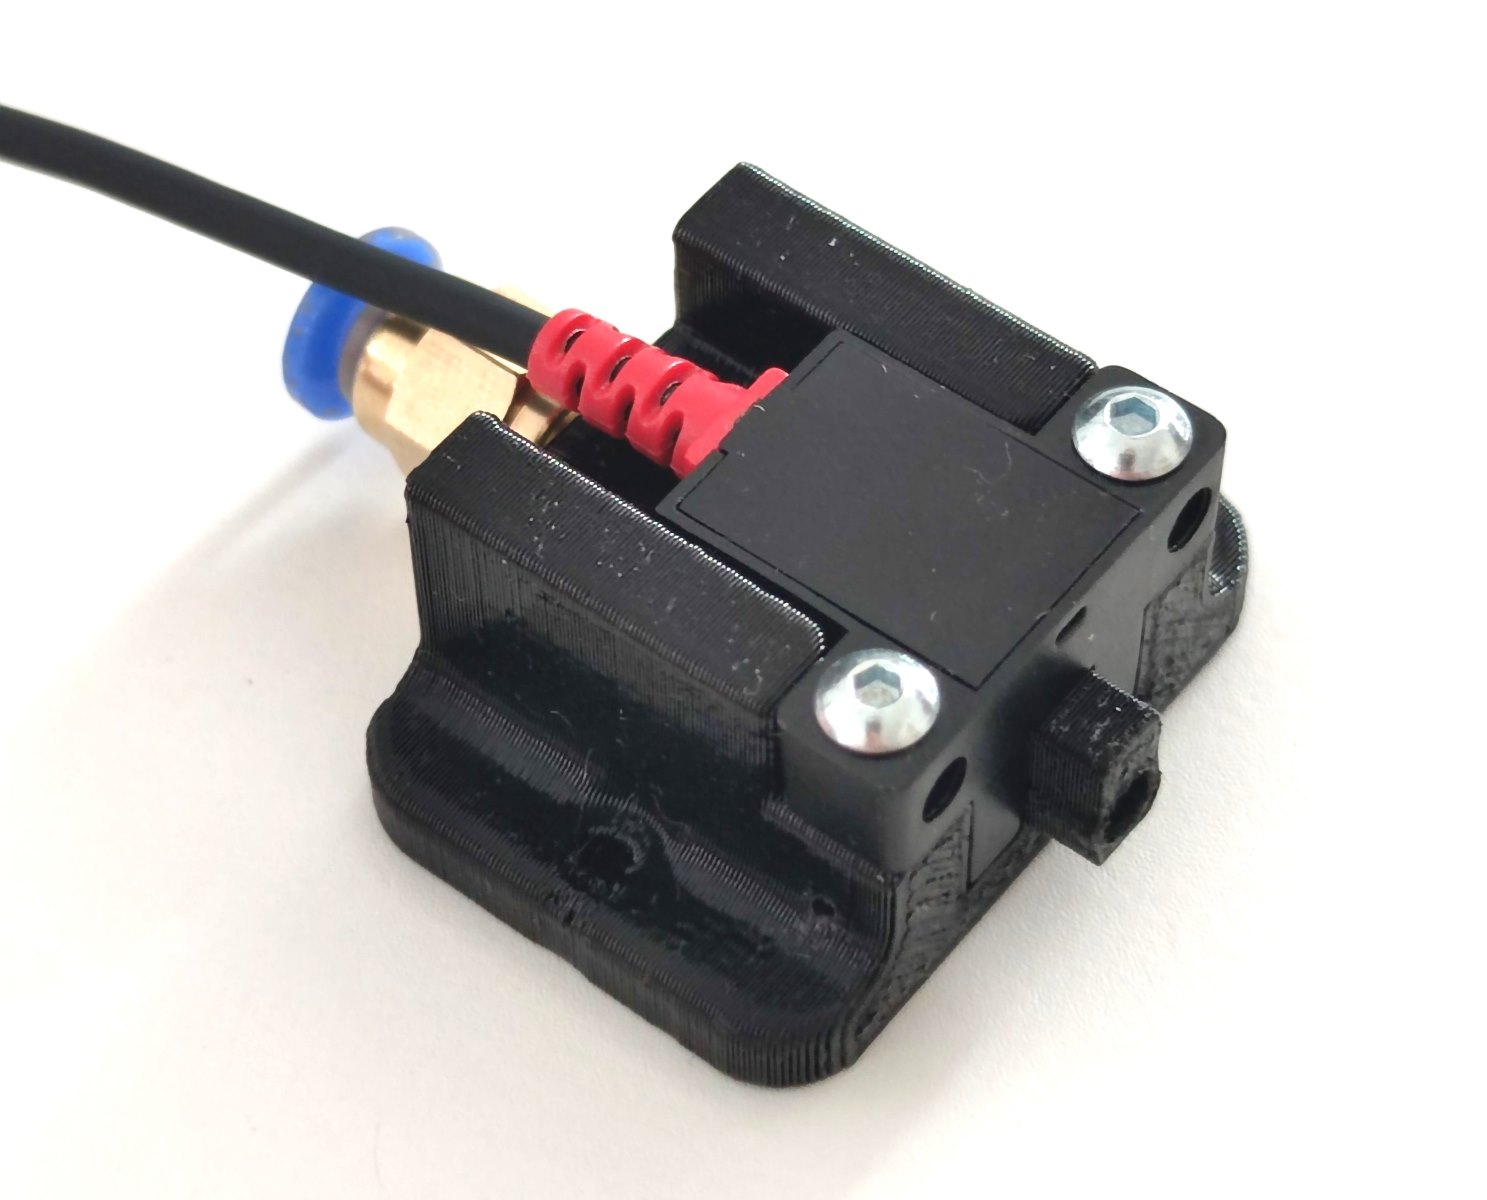
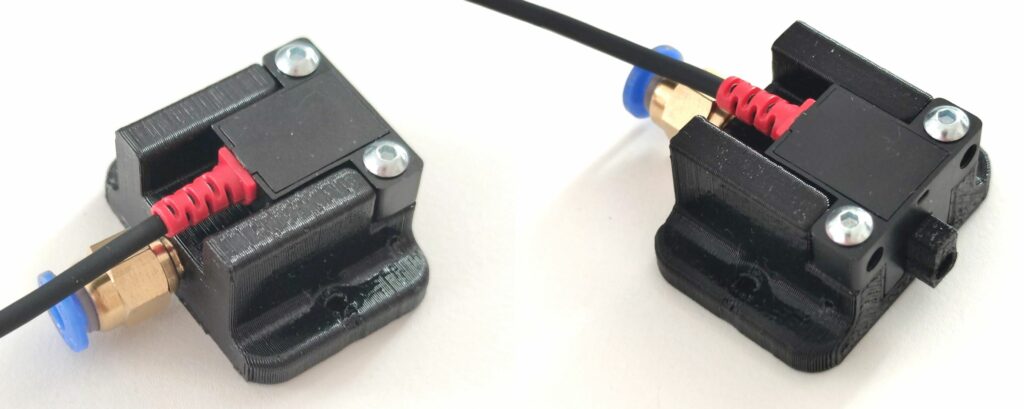
The sensor is ordinary NPN or PNP switch that has infrared sensor which detects the presence of the object between the two “forks” of the sensor. We designed the 3D printed part (enclosure) for the sensor that has a passthrough for the filament. The IR beam is interrupted with the filament and the sensor detects the presence of the filament. If the filament runs out, the light beam is no longer interrupted and the sensor sends the signal to the controller board.
For best reliability it is essential that the 3D printed sensor housing is post processed. It has some small diameter holes that has to be drilled with appropriate size drills. The part also has to be deburred in order to remove any impurities for improved reliability. The main feature is the hole for the filament, which is 2mm in diameter but the intersecting hole for the light beam is only 1.4mm in diameter so the light is reliably interrupted.
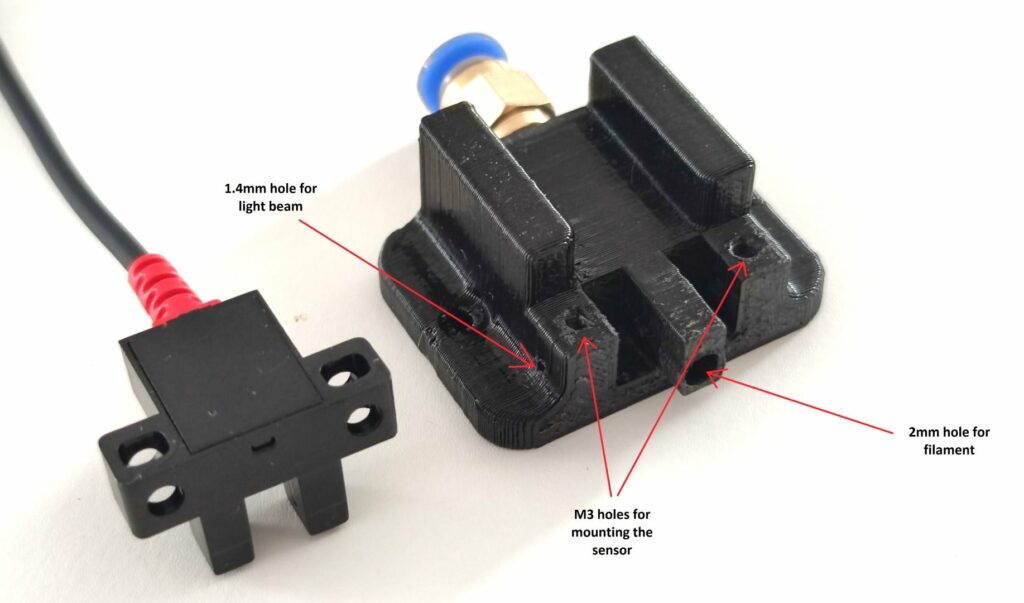
Homing sensor is mounted with two M3 bolts and it seats in the appropriate part of the housing. At the back of the sensor, there is 4mm quick fitting for the PTFE tube that guides the filament to the extruder. Whole assembly is mounted on a 3D printer with two M3 bolts near the filament spool for easy inserting of the filament.
Testing and troubleshooting your filament sensor
Our homing sensor has light, that indicates when the sensor is active and also when the light beam is interrupted. With mounting the sensor into the 3D printed housing, the light is hardly visible. In some cases, it can still be observed and the functionality of the sensor can that way be tested. The reliability can further be tested with the multimeter. Note that the voltage level can not be directly tested on the signal lead since the sensor does not have an integrated pull-up resistor.
About
Polabs, develop and manufacture electronic products for CNC, automation, home automation etc. We can also modify our product for customer needs and develop new products for our customers. Below, here you can find some related blog posts about the homing sensor:
Find out more about probing:
Related Posts