We had a problem with unreliable operation of the microscope LED light on our microscope for PCB inspection and assembly. LED boards were constantly dying and we decided to develop and properly replace them with our own Mantis Compact LED array kit.
Why is LED lighting important for PCB testing and assembly?
PCB testing and assembly is field where high precision and accuracy is needed. It is essential be able to see minor details and to adapt the environment for eye comfort. With microscope or loupes the quantity of the light that is entering our eyeball is lower. That is because the viewing angle is smaller and less light is reflected from the object to our eyes.
That is why the intensive and appropriate lighting is essential with every microscope. It enables you to clearly see even with the highest zoom setting. With properly adjusted lighting our eyes don’t get tired after extensive amounts of time with the microscope.
Advantages of newer LED technology?
Previous design of microscope LED lighting utilized traditional 5mm LEDs. These LEDs use epoxy resin to encapsulate the semiconductor chip and wire bonds from the environment. The encapsulation also serves as lens for light diffusing and directing. Nowadays these LEDs are less used because of the mounting style (THT) and lower reliability. They are being replaced by SMD higher power LEDs.
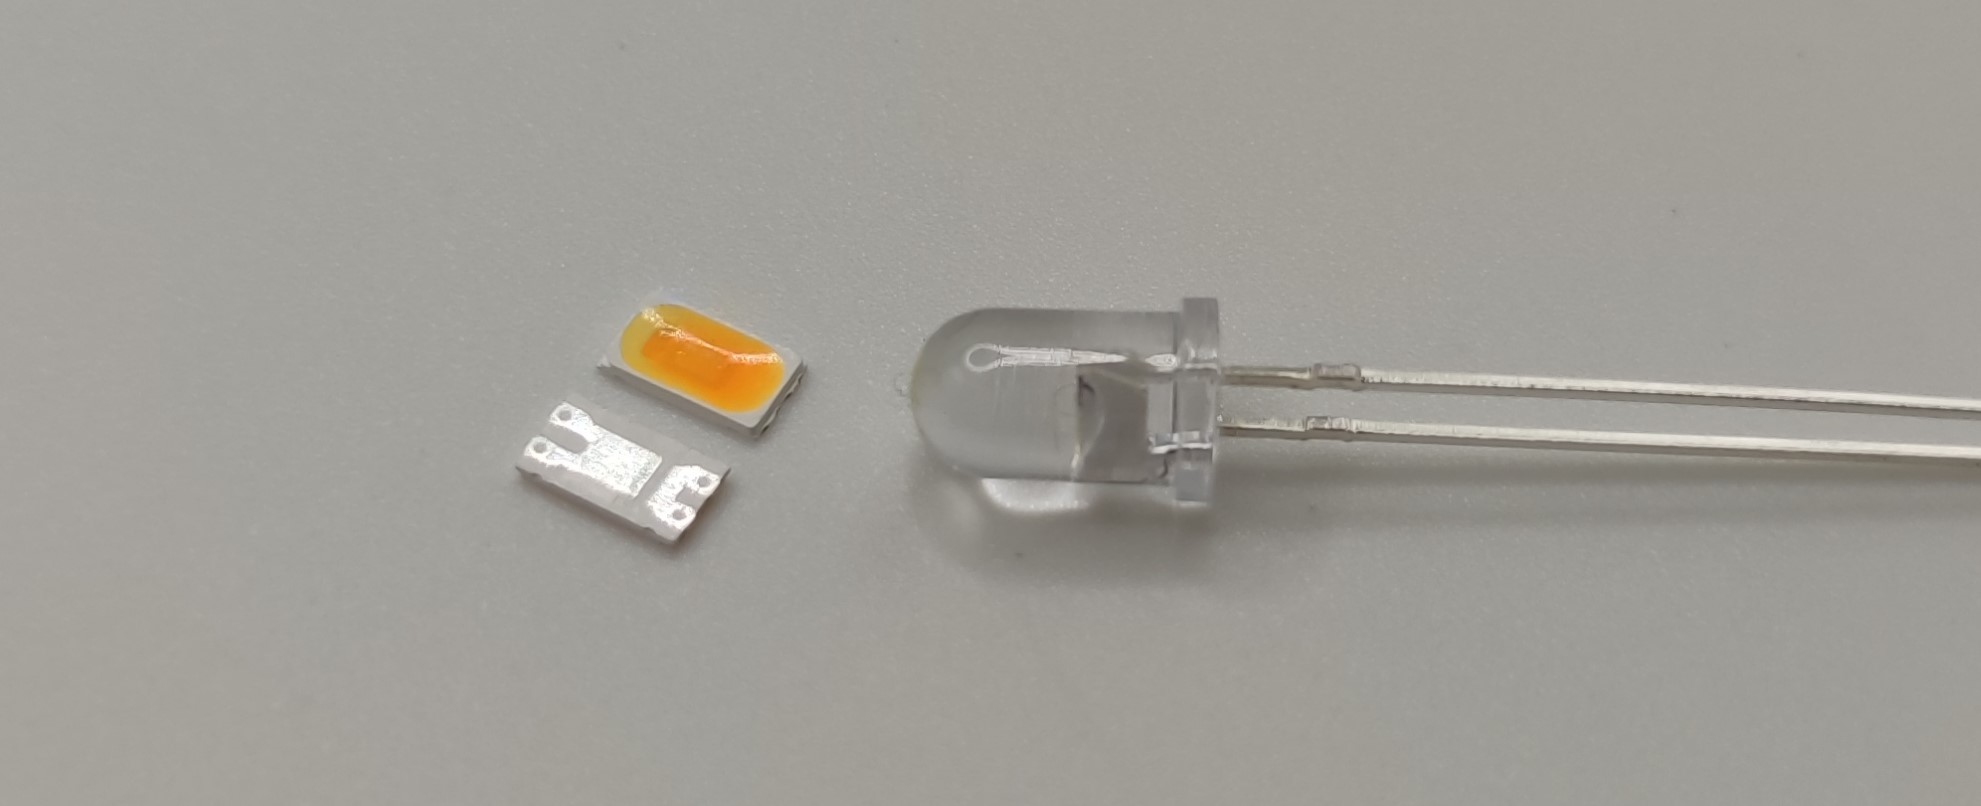
Reliability and longevity of the LEDs is often associated with the ability to dissipate heat. In case of 5mm package, there is less thermal coupling to the ambient air to dissipate heat. As result, power ratings and reliability of these LEDs is usually lower than SMD ones. SMD LED on the other hand usualy include bigger thermal pad that is connected to the copper plane of the PCB so heat is much better dissipated.
Mounting the LED panels on the Mantis Compact microscope
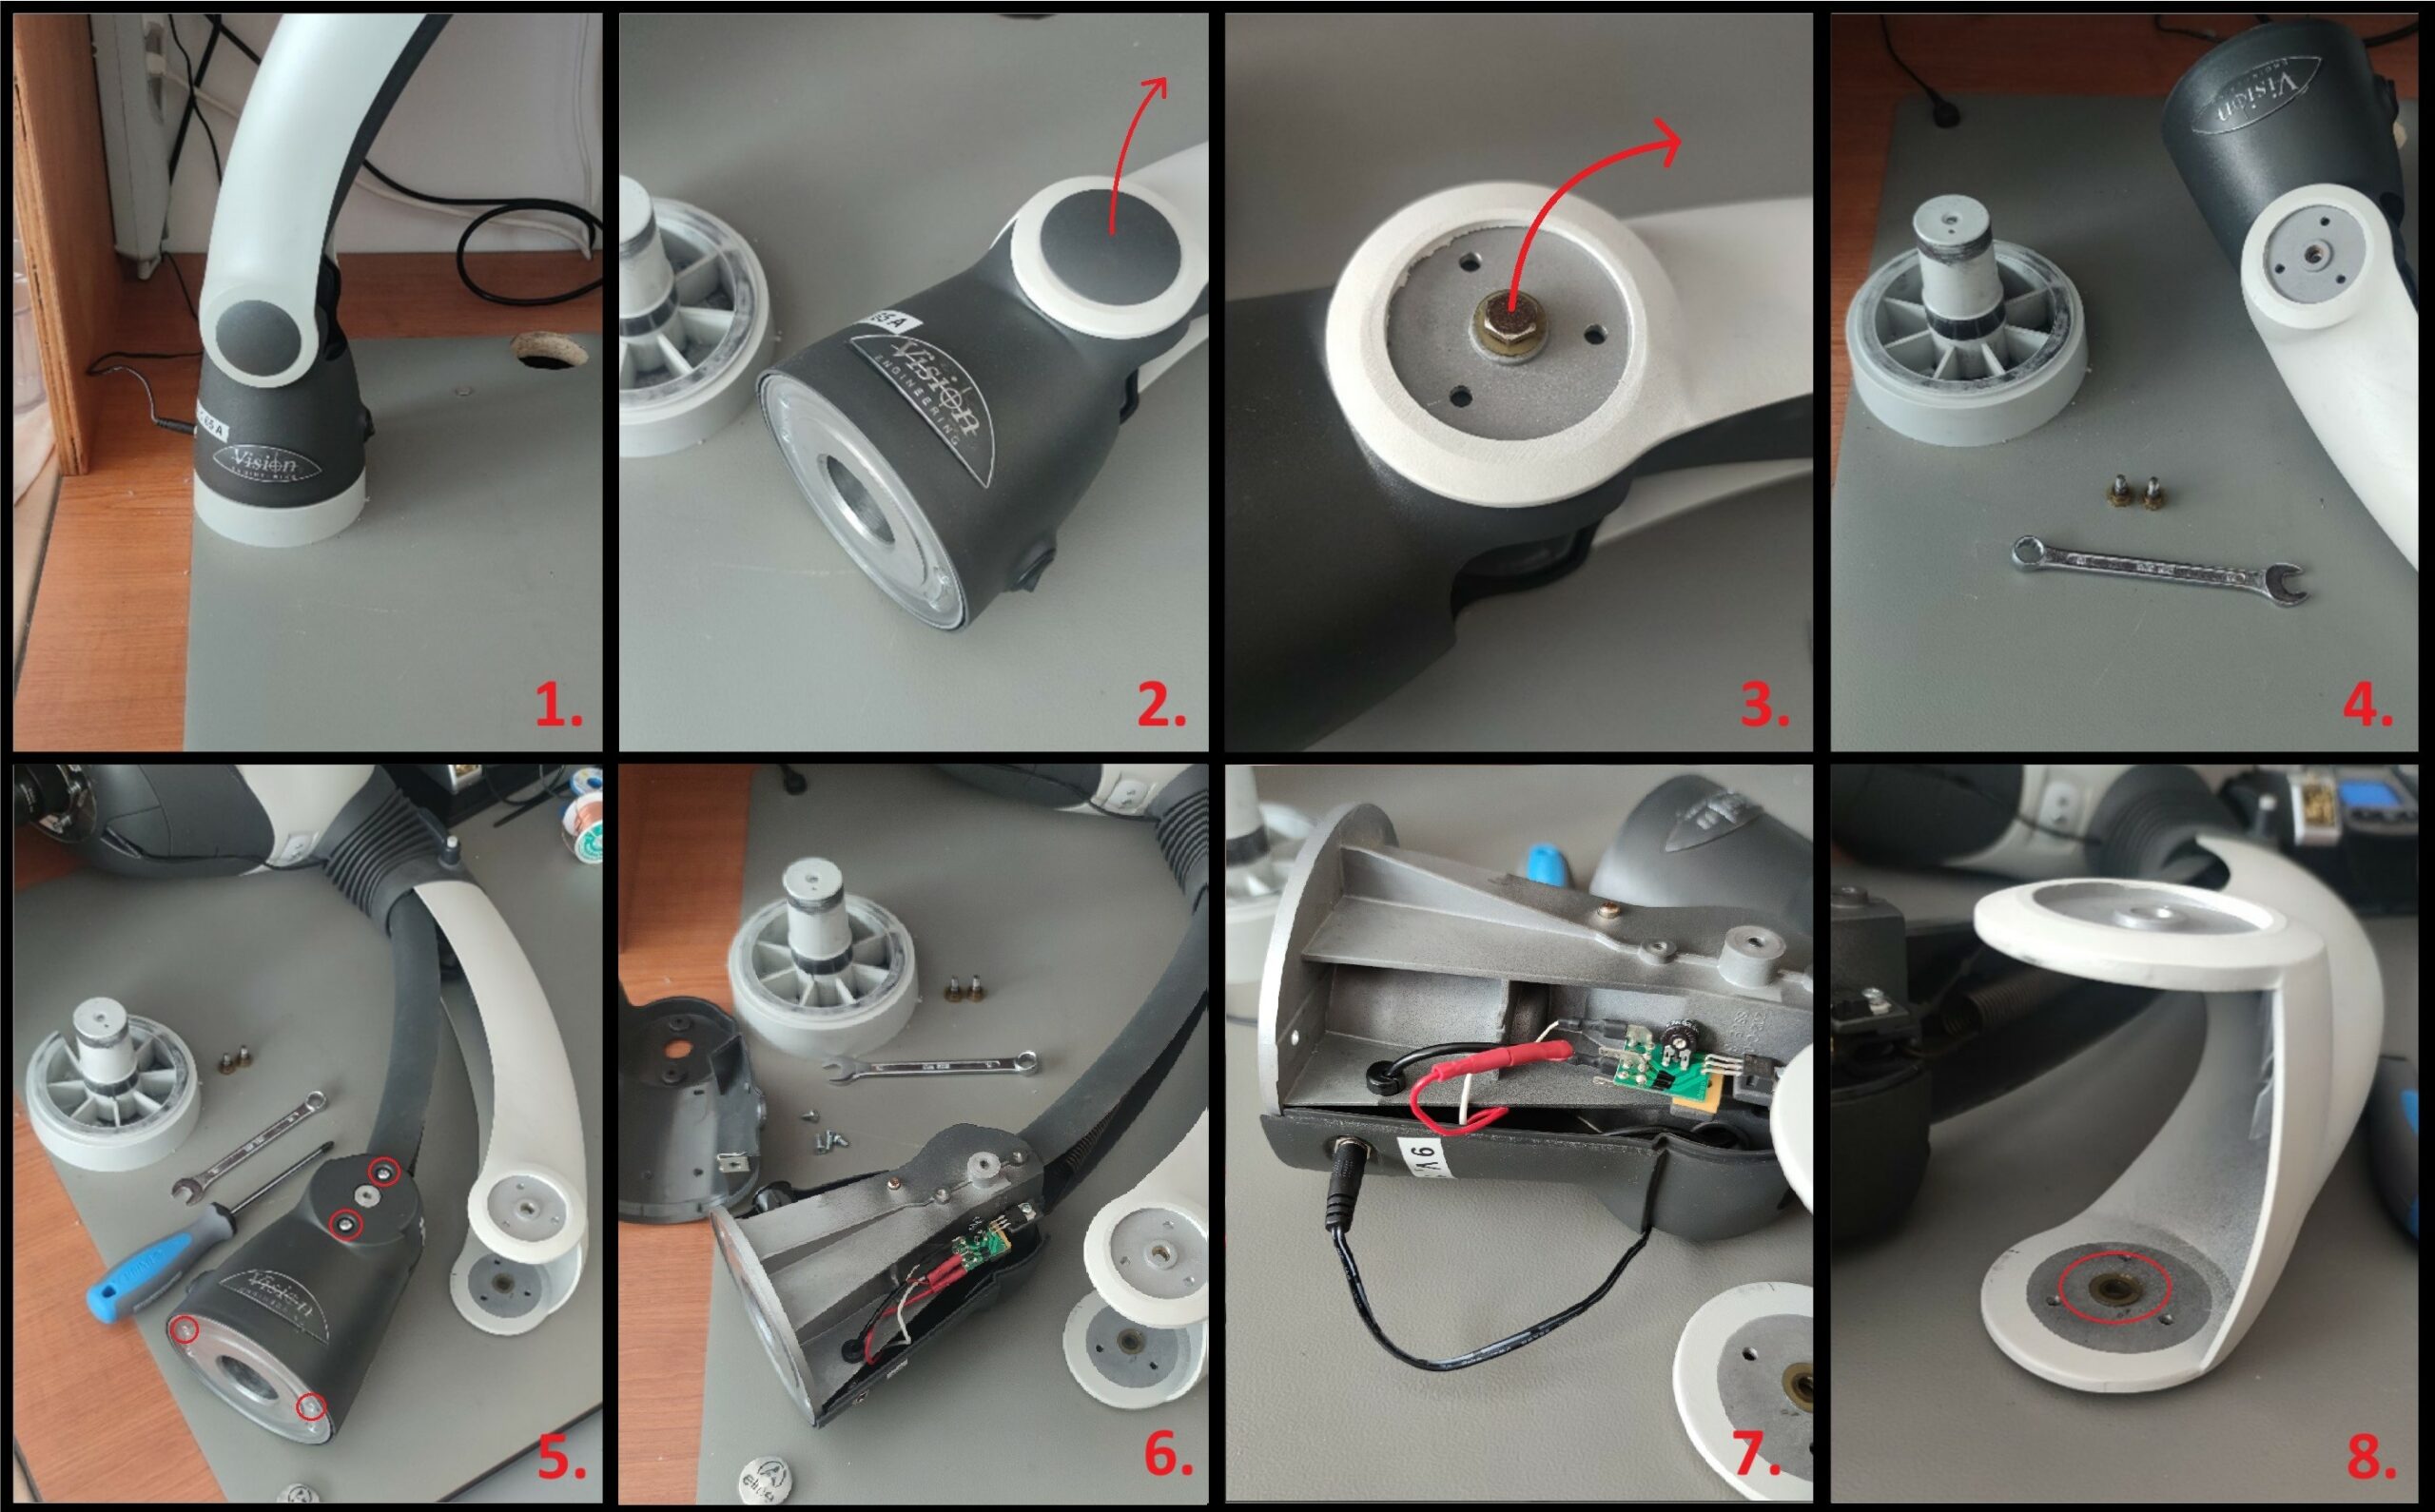
Mounting our LED panels on the microscope is pretty straight forward. Firstly the microscope has to be unmounted from the base by just lifting it. Be careful because there should be grease around the joint. Next, two plastic covers has to be removed on the lower joint to expose two screws. After unscrewing the screws and slightly moving the lower end, another plastic cover should be unmounted. Then, small PCB is exposed with two red cables. The only thing that has to be done here is to unplug the two red wires and connect them together via the metal piece that is provided in the kit.
Afterwards, everything can be assembled back together. Be careful to properly insert the plastic washers back in their place. They enable frictionless motion of the arm and have to be there.
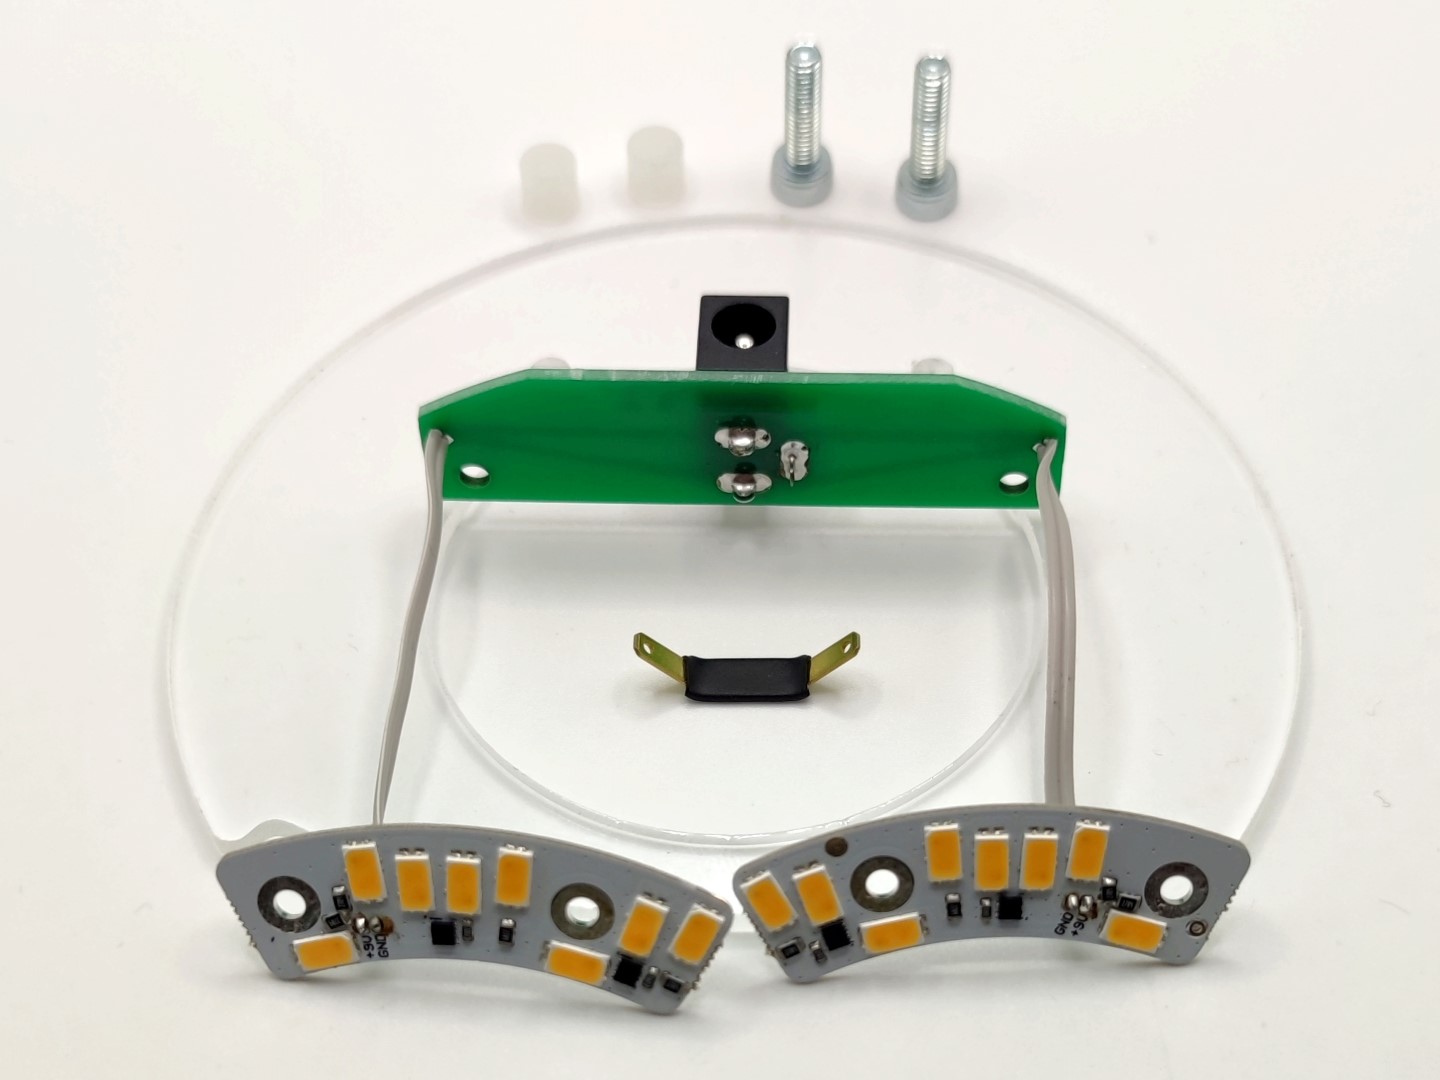
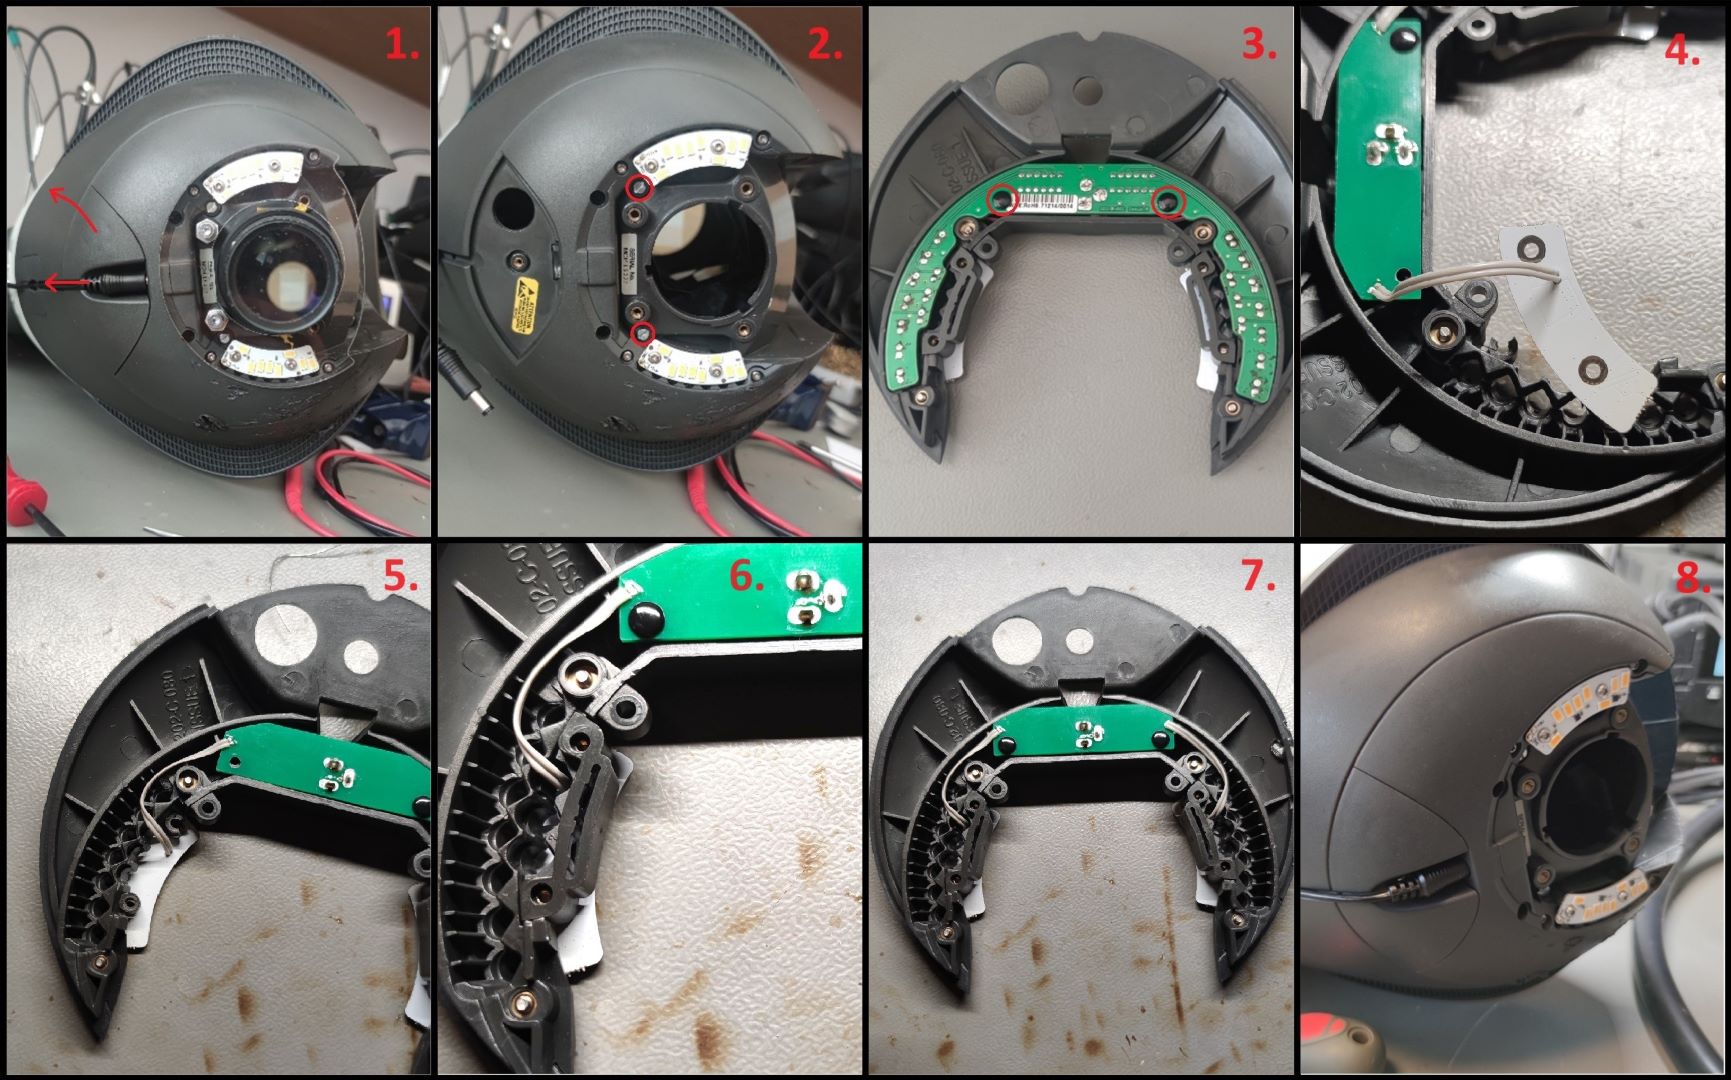
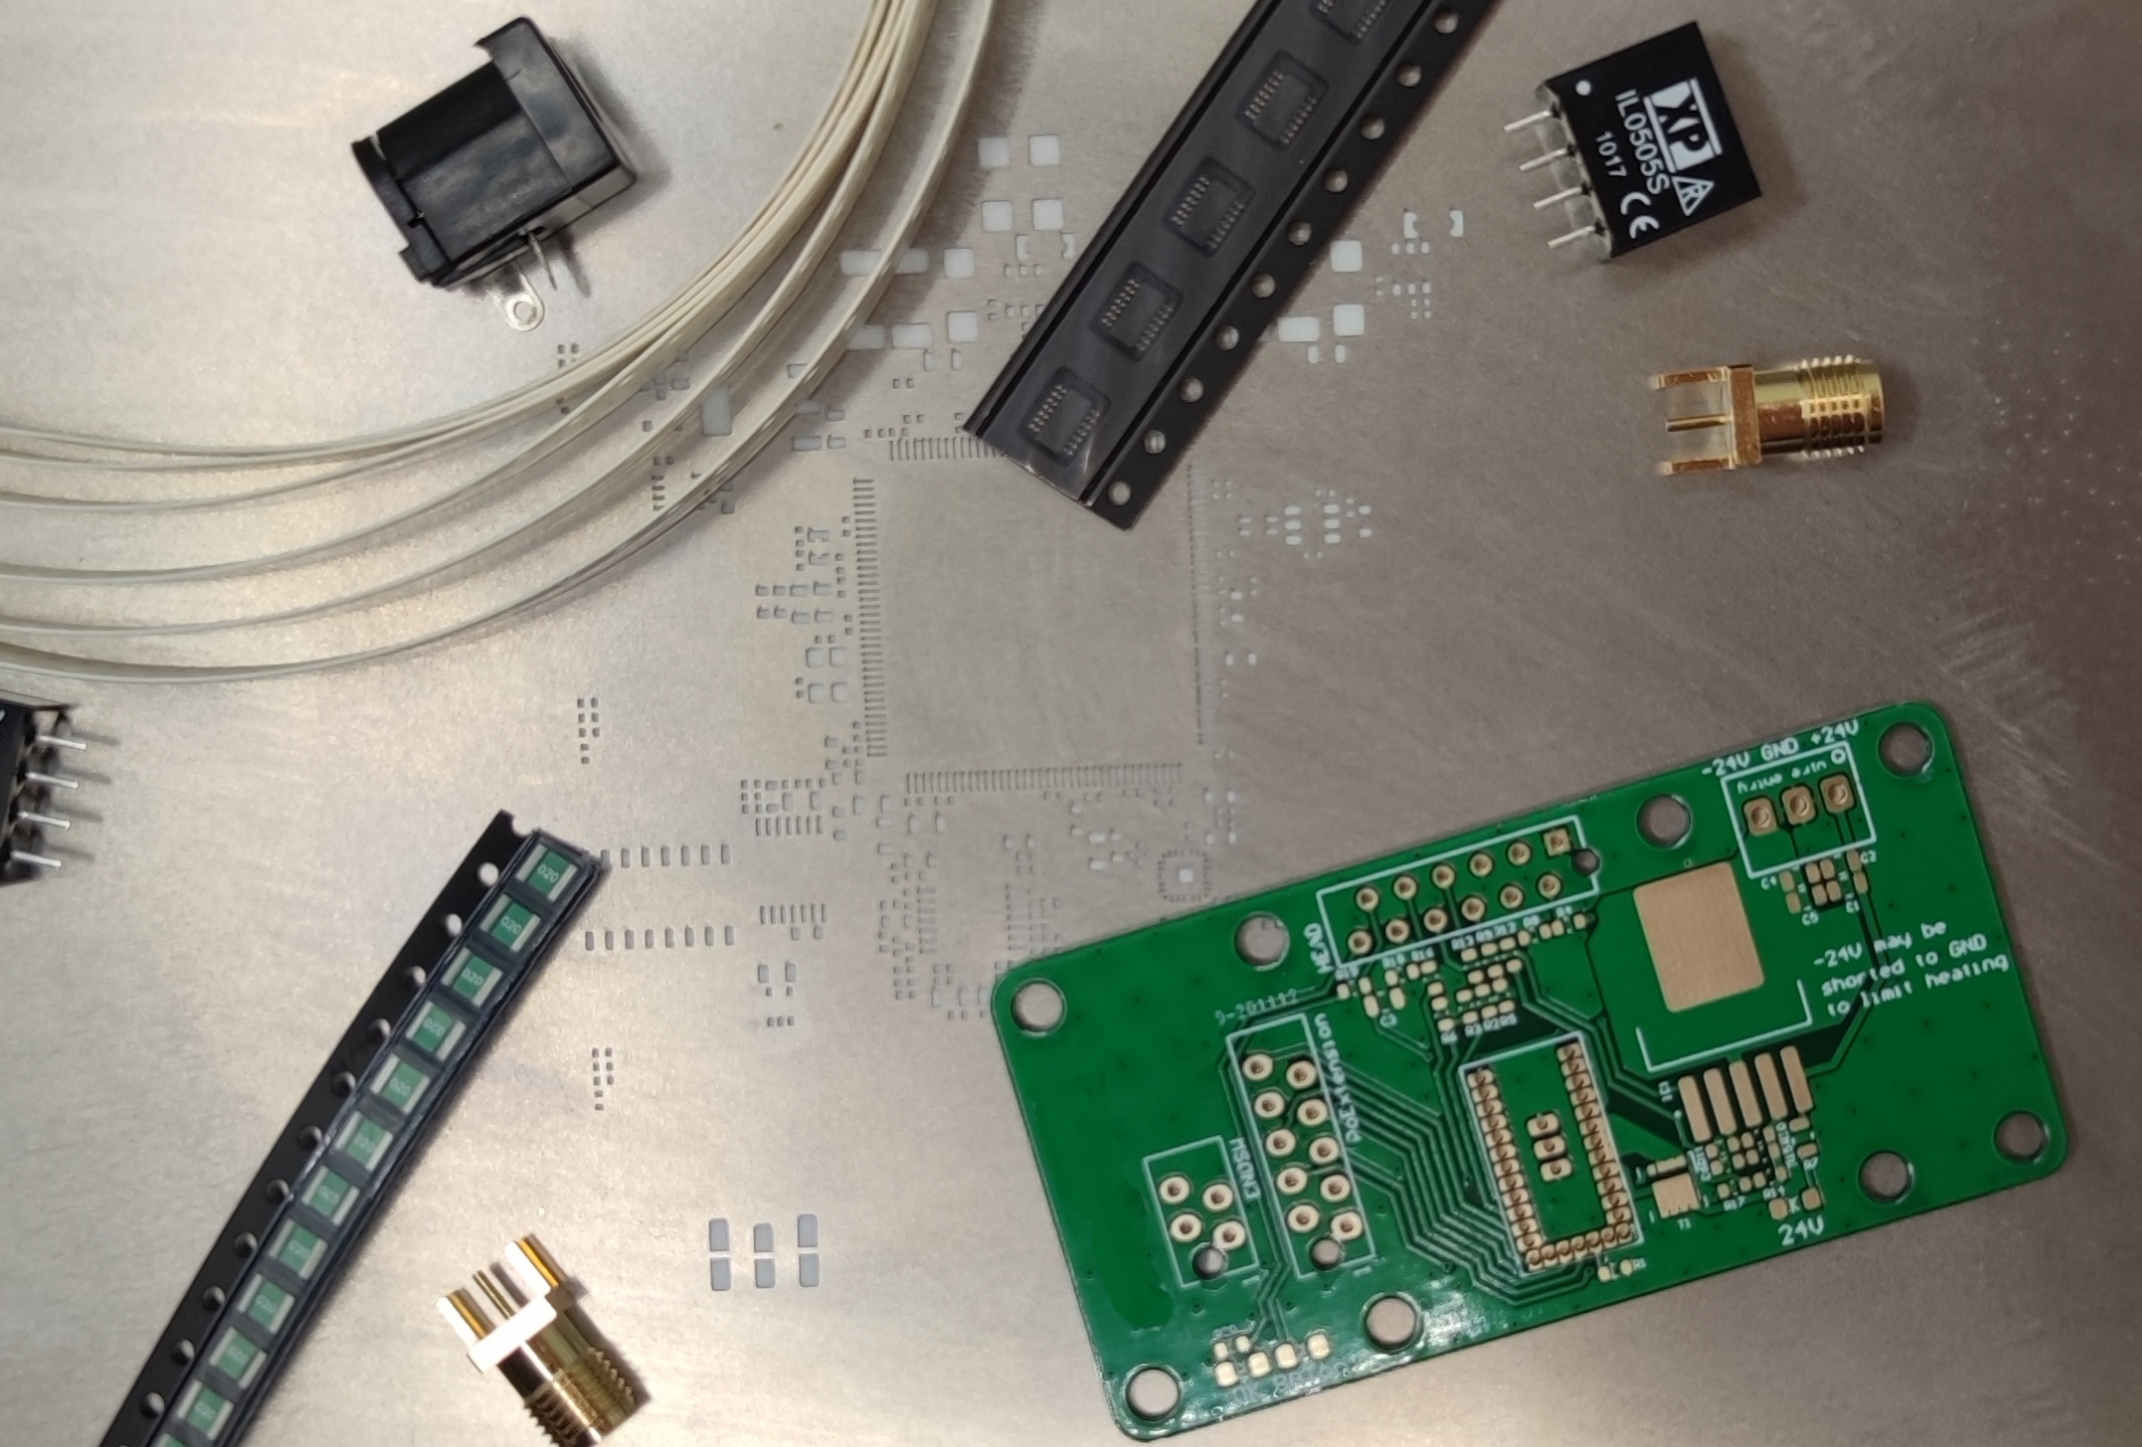
Final thing is to disassemble the upper end where the existing LEDs are mounted. In the kit, everything is prepared and already soldered. The boards only need to be placed in the right position. The old PCB can be discarded and the green PCB from the kit is placed in the position of the old one with the connector facing to the back.
Then mount everything back together and screw on the LED panels to the existing plastic block. The new LED panels are designed so that existing holes can be utilized for mounting. Be careful to properly connect the cable from the microscope arm to the assembly so that it is fully plugged. If LEDs are functioning properly, microscope can be assembled back together as it was dissassembled and the upgrade is complete. The plexi cover can also be added and screwed on the existing holes with the help of plastic spacers.
Is microscope LED lighting now more reliable?
As previously mentioned, LEDs are much more reliable if they are used correctly. They need proper heat management with good heat dissipation. Another aspect is also how LEDs are driven. They should be fed with the constant current for which special part of circuitry is responsible.
We performed the upgrade months before writing the article and the performance of the newer LED panels is significatnly better than before. There is no visible degradation of the LEDs and lighting is much brighter than before which adds to better user experience when assembling or debbuging the PCBs.
How we develop new products
We have the inhouse capability to develop new products. We have a ever expanding line of CNC and measurement accessories and controllers and we are constantly trying to upgrade and evolve the product lines. The market in constantly changing and the demand for the new and upgraded products is bigger every day. We try to follow with the hardware as well as software upgrades and expansions for new capabilities and ease of use.
We also offer custom development of modified products or new products for your special needs. Our offer consists of special and custom machine controllers or custom PCBs for all sorts of peripherals and sensors. We are happy to accomodate your need so in case of interest in such collaboration contact us by means of opening a new ticket on our support page.
Related Posts