This tutorial will show how to trigger an action in Mach4 based on signal change. In Mach4, user customization options are available via simple LUA scripting language.
We will map the signal to one of the PoKeys inputs and configure it to trigger the ‘Cycle start’ function. We assume you have configured the PoKeys device in Mach4 already – if not, follow this guide: Mach4 CNC Controller Software with PoKeys
Mapping the signal
Open Config > Mach configuration dialog and switch to ‘Input signals’ tab. Select your PoKeys device and appropriate IO using the drop-down boxes. We selected pin 15 in the following screenshot
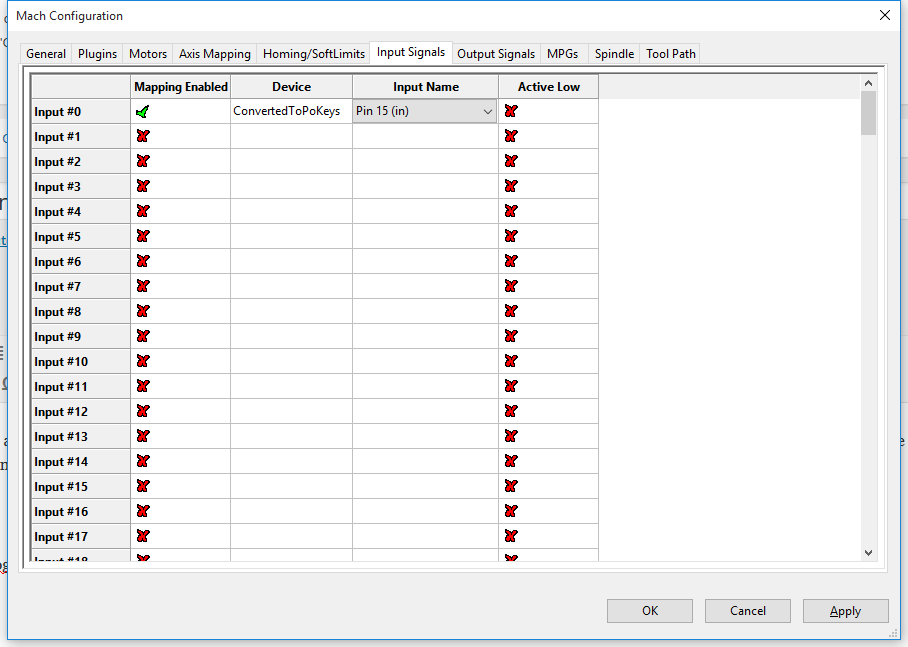
Confirm the configuration and close the dialog.
Opening the signal mapping code
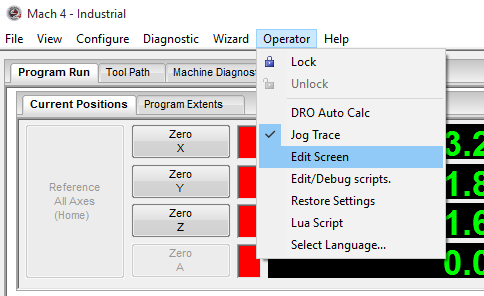
The signal mapping code is a part of the Mach4 screen (window) initialization code, accessible from the screen editor. Go to ‘Operator >
Once the screen editor is opened, one has the access to all parts of the Mach4 GUI parts. For mapping the signal, we will edit the Screen Load script. In the list on the right, locate the top element in the list (also the name of your screen – e.g. wx4, wx6 etc.) and click on it. In the lower left corner, locate the ‘Properties’ pane. There is a ‘Events’ button that will open the list of Mach4 scripts that are a part of the screen.
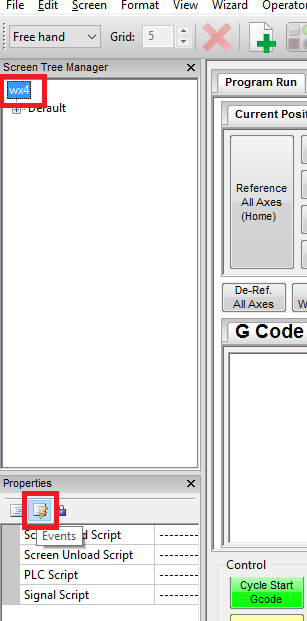
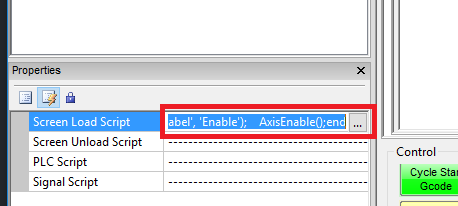
Locate the ‘Screen Load Script’ and click in the field on the right. A button (with ‘…’) will appear that will open the script editor when clicked.
Editing the code
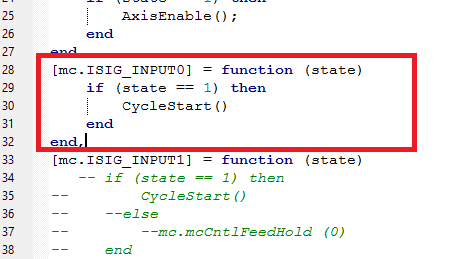
Locate the list of function declarations in the code that look similar to the code highlighted in green and red boxes on the image below.
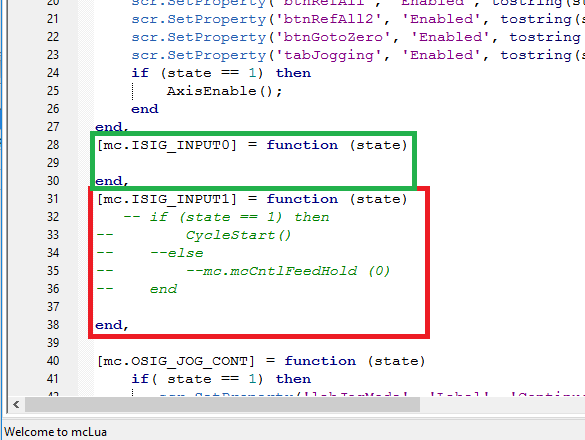
This part of the code initializes the list of signals and their respective function handlers. In the default screen, ISIG_INPUT0 signal has an empty function declared, while the ISIG_INPUT1 signal has a function with some example code that shows how to trigger the function in Mach4.
Let’s add the following code to the ISIG_INPUT0
    if (state == 1) then
        CycleStart()
    end
The code now looks
Save the code, then exit the screen editor (again via Operator > Edit screen menu). Save the changes to the screen and test your new shortcut.
Adding more signals
If you look at the code in the script, you will notice that you have somewhere in the beginning
---------------------------------------------------------------
-- Signal Library
---------------------------------------------------------------
SigLib = {
Then, one block as following for each signal
[mc.<signal name>] = function (state)
 < code >
end
So, SigLib is a Table name, which contains handler functions for all signals in the list. The SigLib ends somewhere later on (around row 70) with a ‘}’. To add a new signal handler, make sure that you insert it in the Table and that you put a comma at the end of it.
---------------------------------------------------------------
-- Signal Library
---------------------------------------------------------------
SigLib = {
[mc.SIGNAL1] = function (state)
 < code >
end,
[mc.SIGNAL2] = function (state)
 < code >
end,
[mc.SIGNAL3] = function (state)
 < code >
end,
...

[mc.SIGNALn] = function (state)
 < code >
end
}
More information about USB CNC controller and stepper motor driver – complete explanation.
- Bipolar stepper motor driver – PoStep25-256
- Plasma voltage divider
- Plasma cutter troubleshooting guide
Related Posts