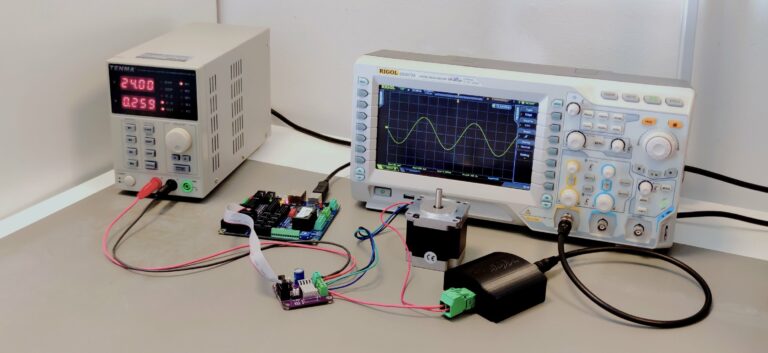
This post is a first PoKeys tutorial in the series of the tutorials for PoKeys57CNC devices. This one will cover the basics on connecting your PoKeys device with the computer and configuring the network connection if it is used.
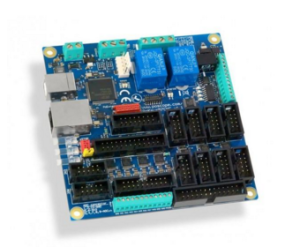
PoKeys57CNC is a blend between general purpose PoKeys device and a USB CNC controller. The device is targeted primarily for controlling up to 8 STEP/DIR signal driven motors (stepper motors, servo drives, etc.) in various applications with the addition of powerful PoKeys device features. Device contains dedicated connectors for connections with motor drivers, pendants, (HD44780-compatible) LCD module, etc. In addition, 5 analog inputs with 12-bit resolution are available. The device also features four galvanically-isolated open-collector outputs and 0 to 10 V analog output.
Installation
Follow the installation guide below to start using PoKeys57CNC device.
Requirements
In order to start using PoKeys57CNC device, the following equipment is needed:
- A power supply (any voltage in the range from 6 to 26 V) rated at 2.5 W or more (e.g. 12 V 250 mA)
- An ethernet or USB cable
- A free ethernet port in your computer or router (if ethernet connection is used)
- A free USB port (if USB connection is used)
Selecting connection type
PoKeys57CNC supports both USB and ethernet connections and allows the user to choose the preferred connection type. The following facts can help choosing the connection type when in doubt which one to use:
- Cable length: USB devices are limited to a combined cable length of 5 meters, while ethernet cables are limited to 100 metersin length
- Power supply: both connection types require that the PoKeys57CNC device is connected to an external power supply. However, for configuration purposes, PoKeys57CNC can be powered via USB connection if no external loads are connected
- Reliability: both connection types provide high reliability and protection against electrical noise. However, since ethernet devices are galvanically isolated, the odds of ground loops are greatly reduced
- Convenience: since most of computers have built-in USB ports, connecting the PoKeys57CNC to a PC via a USB cable is the most convenient solution. However, this requires that the computer is in close proximity to the machine. On the other hand, ethernet cable can be connected to a standard router and make the PoKeys57CNC device available to any PC in the network
- USB only features: PoKeys57CNC device functions as a virtual USB keyboard and joystick, which can be fully configured by the user (e.g. activating the screen controls via keyboard shortcut)
- Ethernet only feature: PoKeys57CNC device feature a built-in web interface and support for Modbus TCP (Server). Both are accessible to other devices in the network, allowing a remote supervision of sensor values or other parameters
Using USB connection
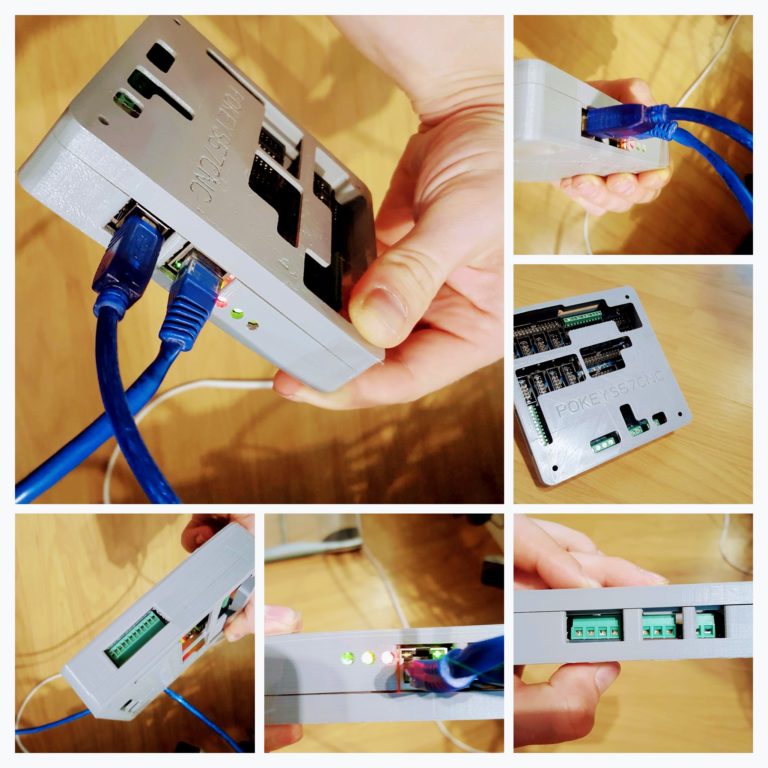
Step 1: Locate a free USB 2.0 port o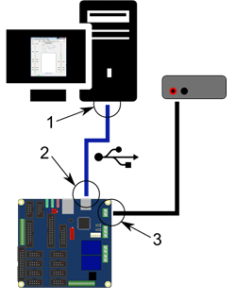 n your computer (1) and PoKeys57CNC board (2) and connect them with a standard USB cable.
Step 2: Connect the PoKeys57CNC board to an appropriate power supply (3).
Step 3: Install PoKeys software
Step 4: Open PoKeys application, connect to your PoKeys57CNC device and enable Fast USB interface (go to Settings > Enable Fast USB interface).
Step 5: Remove the USB cable from PoKeys57CNC device and insert it again. The computer will find a new device and search for drivers. See FAQ section of the manual if driver installation fails.
Using Ethernet connection
Ethernet connection can be used to connect PoKeys57CNC and PC directly or via router. Accessing the PoKeys57CNC device over a wireless network (employing a wireless router) is highly discouraged.
Since most network devices use IP-based communication, a proper configuration of a network is of a utmost significance. Each device in the network must have a unique IP address assigned – this has to be done manually (if using direct connection to a PC) or is done by a router with a DHCP server. PoKeys57CNC devices are designed to operate in /24 subnets (network mask of 255.255.255.0). Other network configurations can also be used, but the operation of the devices will not be optimal (reduced capabilities of automatic device discovery).
Direct ethernet connection PoKeys57CNC – PC
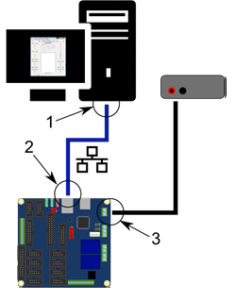 Make sure that an appropriate IP address is assigned to a network card of your PC, that the PoKeys57CNC device is connected to. Follow the steps, described in the following guide: Change TCP/IP settings in Windows 7.
Step 1: Locate ethernet ports on your router (1) and PoKeys57CNC board (2) and connect them with RJ-45 cable (standard network cable).
Step 2: Connect the PoKeys57CNC board to an appropriate power supply (3).
Step 3: Install PoKeys software
Step 4: see below for configuration of network settings
PoKeys57CNC connected to a network with DHCP server
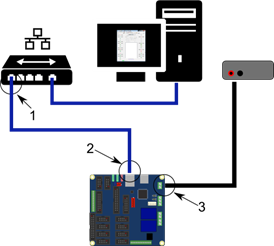 If your router is properly configured, it will automatically assign addresses to your PC and PoKeys57CNC device.
Step 1: Locate ethernet ports on your router (1) and PoKeys57CNC board (2) and connect them with RJ-45 cable (standard network cable).
Step 2: Connect the PoKeys57CNC board to an appropriate power supply (3).
Step 3: Install PoKeys software
Step 4: see below for configuration of network settings
Configuring PoKeys57CNC network settings
Open PoKeys configuration application. A ‘Select device’ (Connect) dialog will appear, listing all available PoKeys devices that have been automatically detected. The following screen capture shows a list of 4 devices that have been detected – one PoKeys57U device, one PoKeys57E device and two PoKeys57CNC devices. By clicking on the PoKeys57CNC device entry, the device data section on the right of the dialog will show device details, including the currently assigned IP address.
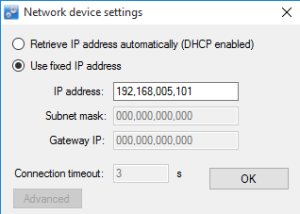
 In order to configure the PoKeys57CNC device network settings, click on ‘Configure’ button and the following dialog will appear, allowing you to change between automatic IP retrieval (using DHCP) or manual configuration.
An only IP addresses can be manually configured here since you are not yet connected to the device fully. In order to configure all network settings, connect to the device first, then open Device > Network device settings.
Autoconfiguration of the device address
PoKeys57CNC devices employ an autoconfiguration process that in case of unconfigured (or misconfigured) PoKeys57CNC device network settings, assigns a temporary address to the device so that the device can be detected by the PoKeys application and configuration updated. Such address is recognized by the last part of the IP address being equal to .250. This address must not be used during the normal operation of the device.
The autoconfiguration can be disabled in the network device settings dialog under the ‘Advanced’ options (by checking the ‘Disable automatic cross-subnet detection’ option). If automatic device discovery option is disabled, the software will not be able to automatically detect PoKeys devices in the network and a correct IP address of the device will be needed to connect to it. If settings are misconfigured, the device can be put into Recovery mode and settings reset, as described in the PoKeys manual.
If you need information about stepper motor controllers- (PoStep). Here is: complete explanation- stepper motor driver. A lot of information about types of stepper motor drivers, micro – stepping and more.
Please check also our latest products and blog posts:
- Plasma divider
- Bipolar stepper motor driver – PoStep25-256
- PCB tester
- 4th axis for CNC
- Plasma cutter troubleshooting guide

