Mach4 tutorial – FRO setting from PoKeys analog input
This Mach4 tutorial will help you configure Mach4 and PoKeys so you can set FRO from analog input pin. Click on PoKeys_analog_FRO(526b) to download a file which is needed for this tutorial. Move it to a location easy to find, preferably in the Mach4 folder.
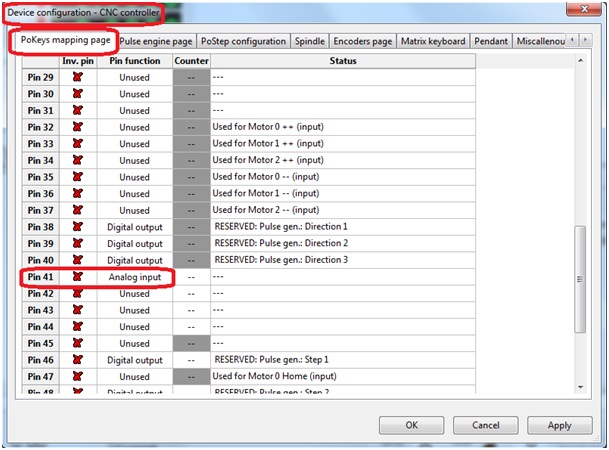
First you must enable the analog input in PoKeys plugin. To do this, open the PoKeys plugin configuration in Mach4 and select your device.
Then go to the PoKeys mapping page tab and select which pin should be analog input. Make sure to check the PoKeys device pinout schematics (under FAQ section on the device’s homepage) for the correct pin number – PoKeys57U, PoKeys57E, PoKeys57CNC.
If not already, connect the potentiometer to the PoKeys device.
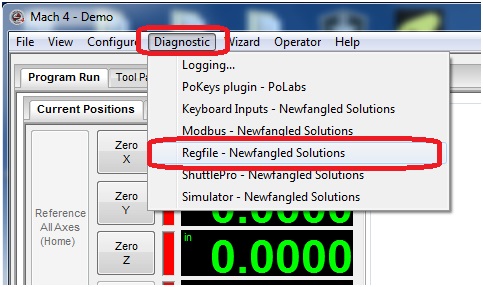
To test if the settings are correct, click on “Diagnostic” tab in Mach 4 and select “RegFile – Newfangled Solutions”.
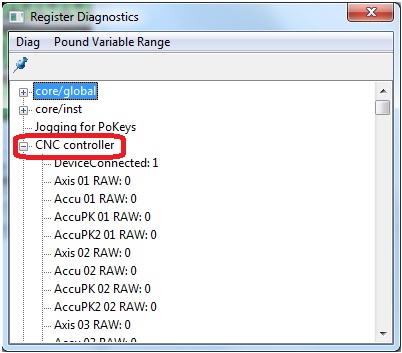
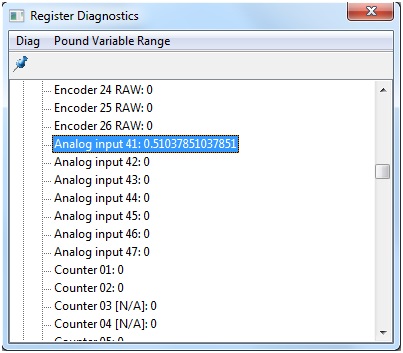
A new window should open. Here you expand your PoKeys device options (in our example, PoKeys device was named “CNC Controller”) and scroll down to analog input. Under desired analog input pin you should see the value change from 0 to 1 as you turn the potentiometer. Value of 0 equals to a voltage of 0 V, while the value of 1 equls to voltage of +3.3 V on the analog input pin.
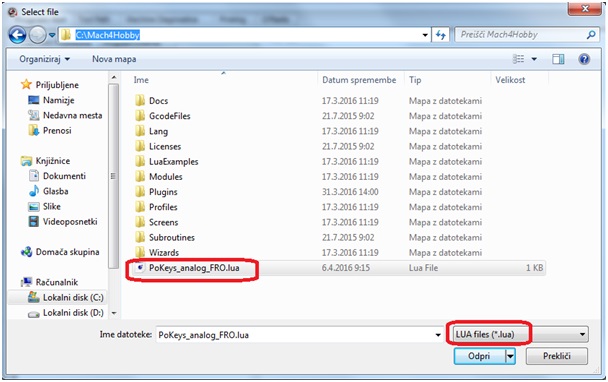
Now open the “PoKeys_analog_FRO.lua” file from Mach4. To do this click on “Operator” menu inside Mach4 and select “Edit/Debug scripts”. Go to the location of the .lua file and open it.
In this file, you must change the “device” and “analogPin” values inside double quote (do not remove the double quotes). The device name is the name of your device and the analogPin value is the analog input pin number.
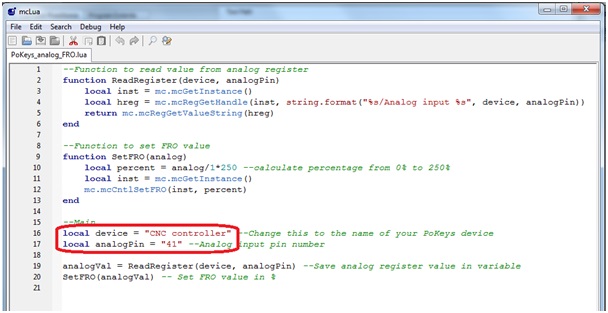
In this example the FRO will change from 0 to 250%. If you want to have a different range you must edit this line:
local percent = analog/1*250 –calculate percentage from 0% to 250%
Once done save the file and close it.
Now we must add one line to the Mach4 PLC script.
Click on the “Operator” menu and select edit screen. Mach4 screen should change a bit.
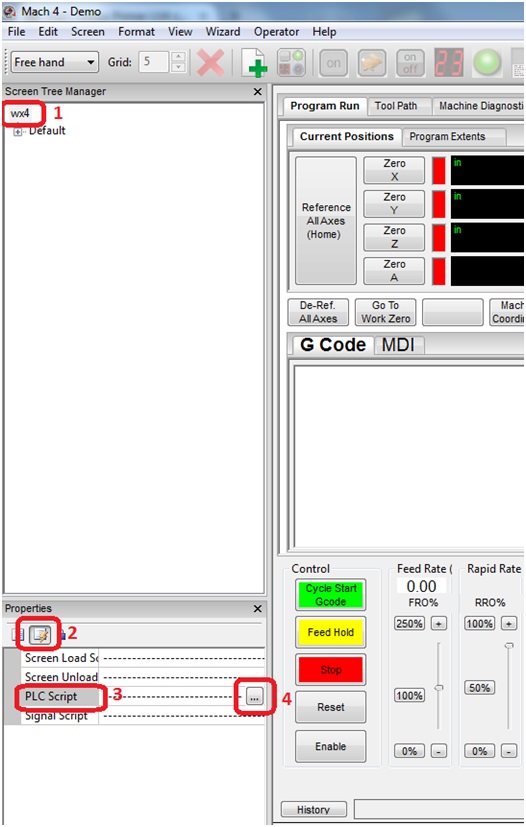
Now there will be 2 windows on the left side of the screen. The top one is the Screen Tree Manager. In this window, select the topmost line (1).
In the bottom window named Properties, click on the second button as shown in the picture (2).
Next find the PLC script option and click on it (3). This will add a button with 3 dots to the right of it. Click this button (4).
When you click this button, the LUA editor with the PLC script will open. Scroll to the bottom of the script and almost at the end add this line:
dofile(“C:\\Mach4Hobby\\PoKeys_analog_FRO.lua”)
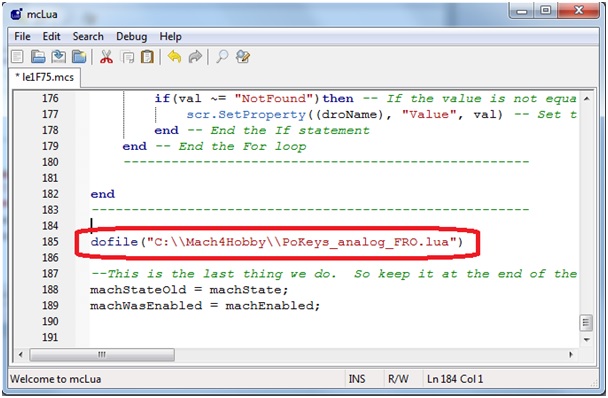
If your path to the PoKeys_analog_FRO.lua file is different you must change the path between ” “. Remember to use double \\.
Now save the PLL script. You can either go to File->Save or click Ctrl+S. You can now close the LUA editor.
Now in Mach 4 again click on the Operator and then the Edit screen. This will stop the editing. When asked save the current screen.
If you have followed this Mach4 tutorial correctly you should now see the FRO slider move as you turn your potentiometer.
If you want to remove this option just remove the line we have just added in the PLC script and if you want to change the input pin just edit the PoKeys_analog_FRO.lua script as shown above.
If you need explanation about stepper motor driver, here is complete explanation of stepper motor driver. Also our best stepper motor driver- PoStep60-256.
Please check some of our products:
- Homing sensor-PoHome1IRNPN
- TORCH HEIGHT CONTROLLER
- Bipolar stepper motor driver -PoStep25-256
- Plasma voltage divider
- Plasma cutter troubleshooting device
- PCB tester
Related Posts