DIY vacuum table introduction
DIY vacuum table is a great way to clamp your pieces to you CNC machine. They can be made in various sizes, and they can be made at home for a fraction of price that would cost you to buy one.
Vacuum tables use vacuum pumps of different sizes to generate enough vacuum pressure to hold the work piece to the table. Depending on your needs, you should buy an appropriate vacuum generator (or pump). For example if you need to mill through a piece, you should have a vacuum pump with high enough air flow to compensate for the holes. Another option would be to use vacuum pods, which are essentially small versions of vacuum tables. You can position them so that the work piece is clamped where no holes will be milled.
Another thing to consider is how large the pieces (that you intend to mill) will be. If the piece is too small, not enough force will be generated and there will be a possibility that the piece could move while machining.
Another great thing with vacuum tables is, that the sheet of plastic for example, will be in contact over the whole area. This means that it will adjust to the table. If the sheet would be bend, and the vacuum table would be straight, this means that the sheet would also straighten out. If you would use standard clamping tools, even a straight sheet of material could become slightly warped. You can always use vacuum table in combination with standard clamping tools. This will produce a high clamping force and will prevent warping.
Electronics for CNC machine: If you need an informations about: the complete explanation about stepper motor driver.
There is also USB CNC Controller, and blog about usb cnc controller by your needs.
Vacuum table types
There are different types of vacuum tables intended for different materials.
A vacuum table with a lot of small holes is intended for cutting paper, vinyl and other similar thin materials. They have a lot of small holes so the material doesn’t warp in to the hole. In general you would use a knife cutter or even a laser cutter for this purpose. Tables with large holes are not useful for this, since the thin materials can easily warp inside holes.
Another type is the one with gratings. This grating vacuum tables are similar to vacuum pods, the only difference is the size. They use rubber cords to provide a seal between the work piece and the table.
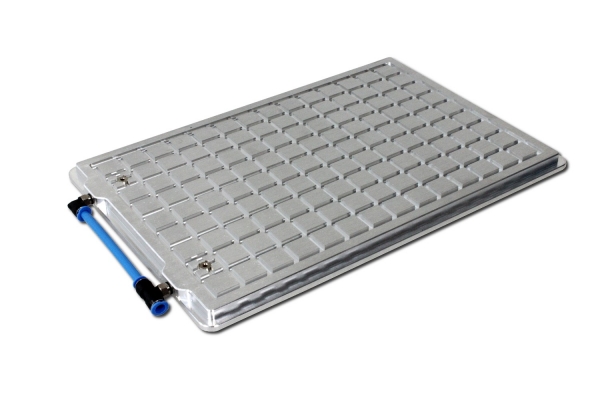
We have made a grating vacuum table as a test and it works perfectly. In the end there are files available for download so you can make one yourself or just get an idea for a different one.
DIY vacuum table construction
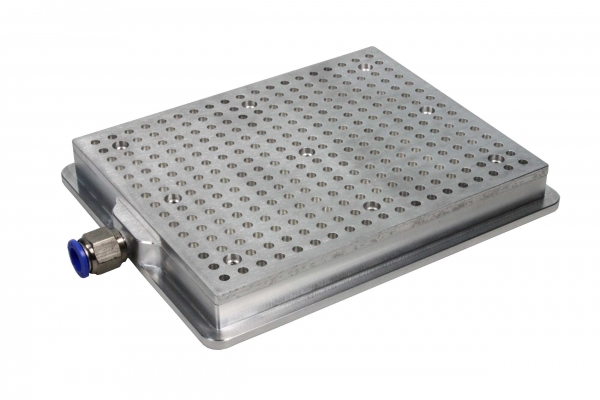
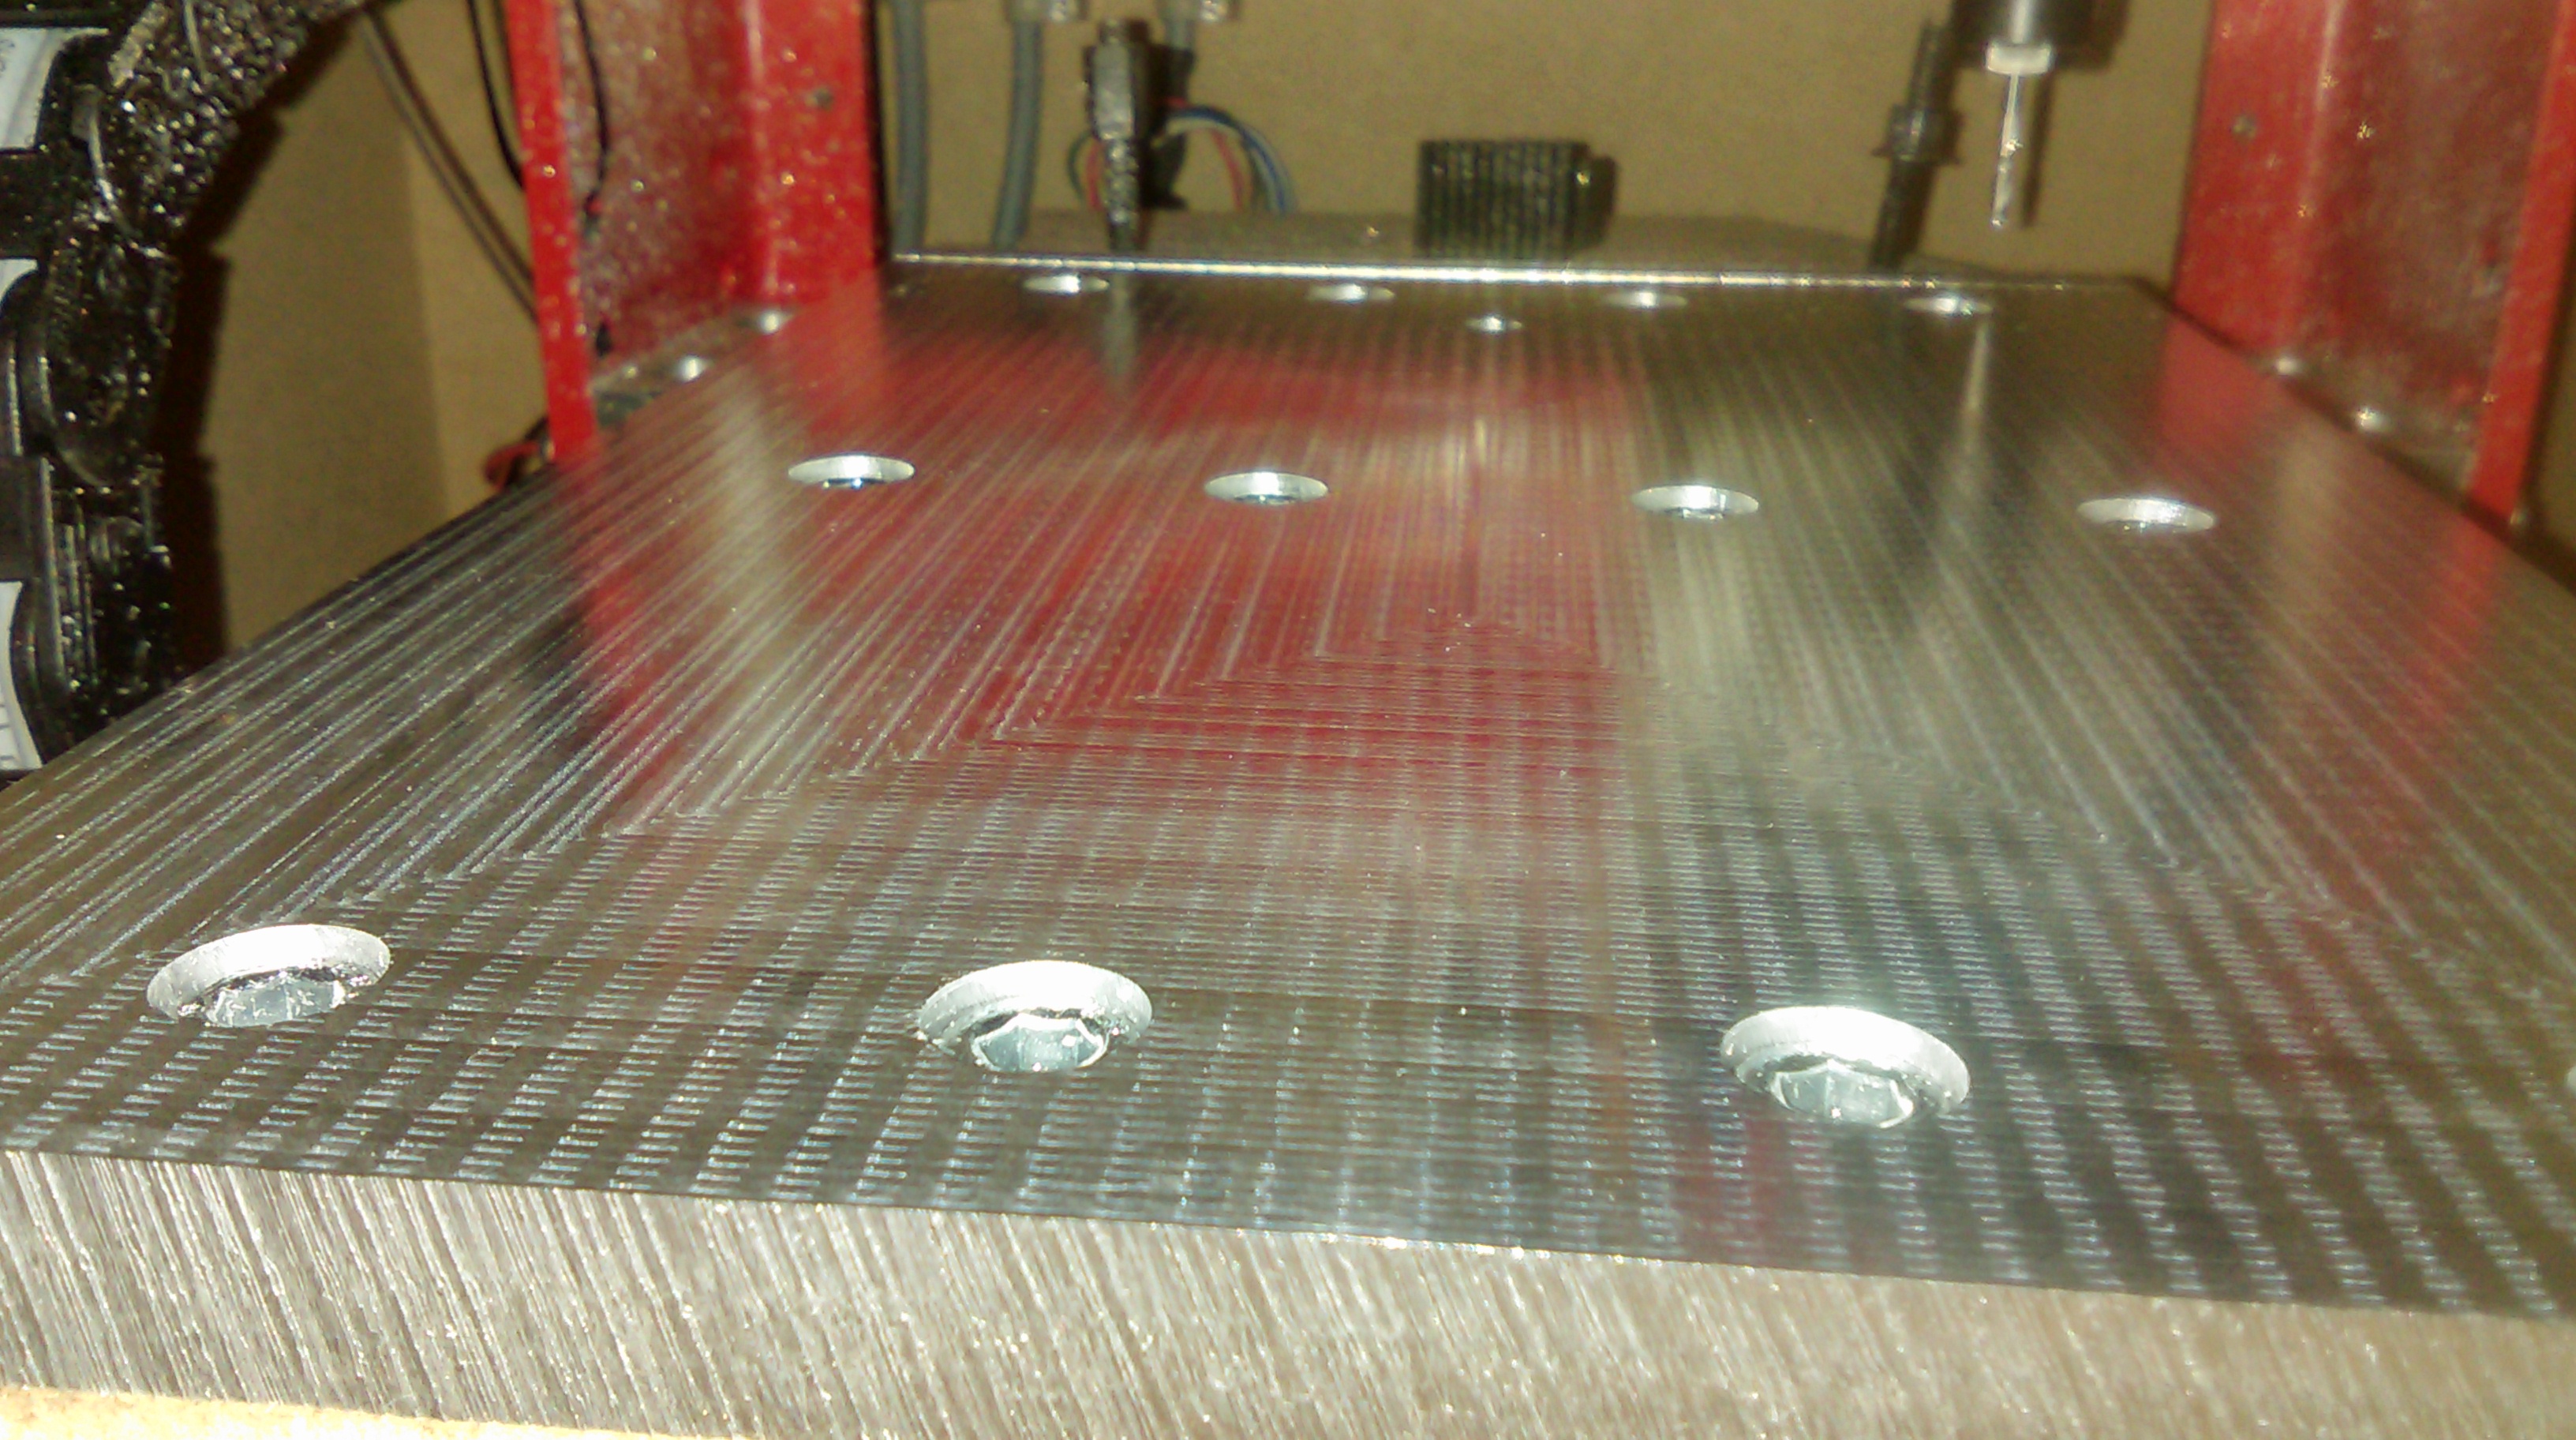
Our vacuum table is made from 20cm x 28cm block of 15mm thick aluminum. We have tried MDF but it was to porous and it would take a lot of work to seal it properly. Another option would be to use plastic. Out table also includes threaded holes so you can still clamp your work piece with other clamping tools. It can be machined with a single 2mm endmill.
First we drilled a hole in the back for the air hose. We used an aluminum tube to connect the table to the air hose.
We then started out by first milling out the holes for the screws that will hold our diy vacuum table in place. We did this, so for all of the next steps the vacuum table would be in its final place and should not be moved. Once the holes for the screws were milled, we clamped the table in place with them and milled the whole surface 0.5mm deep to straighten the table relative to our CNC machine.
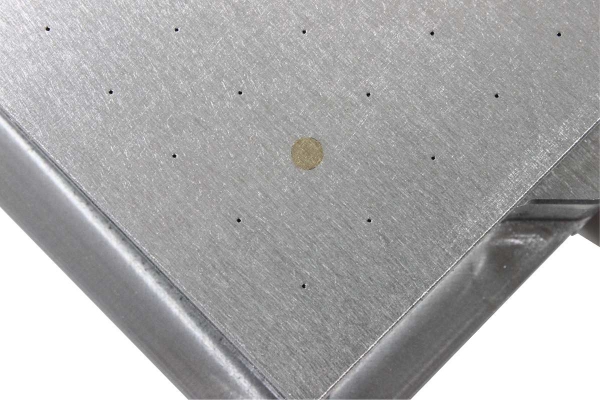
The pictures below show the final result after the milling of the holes and the top surface was done.
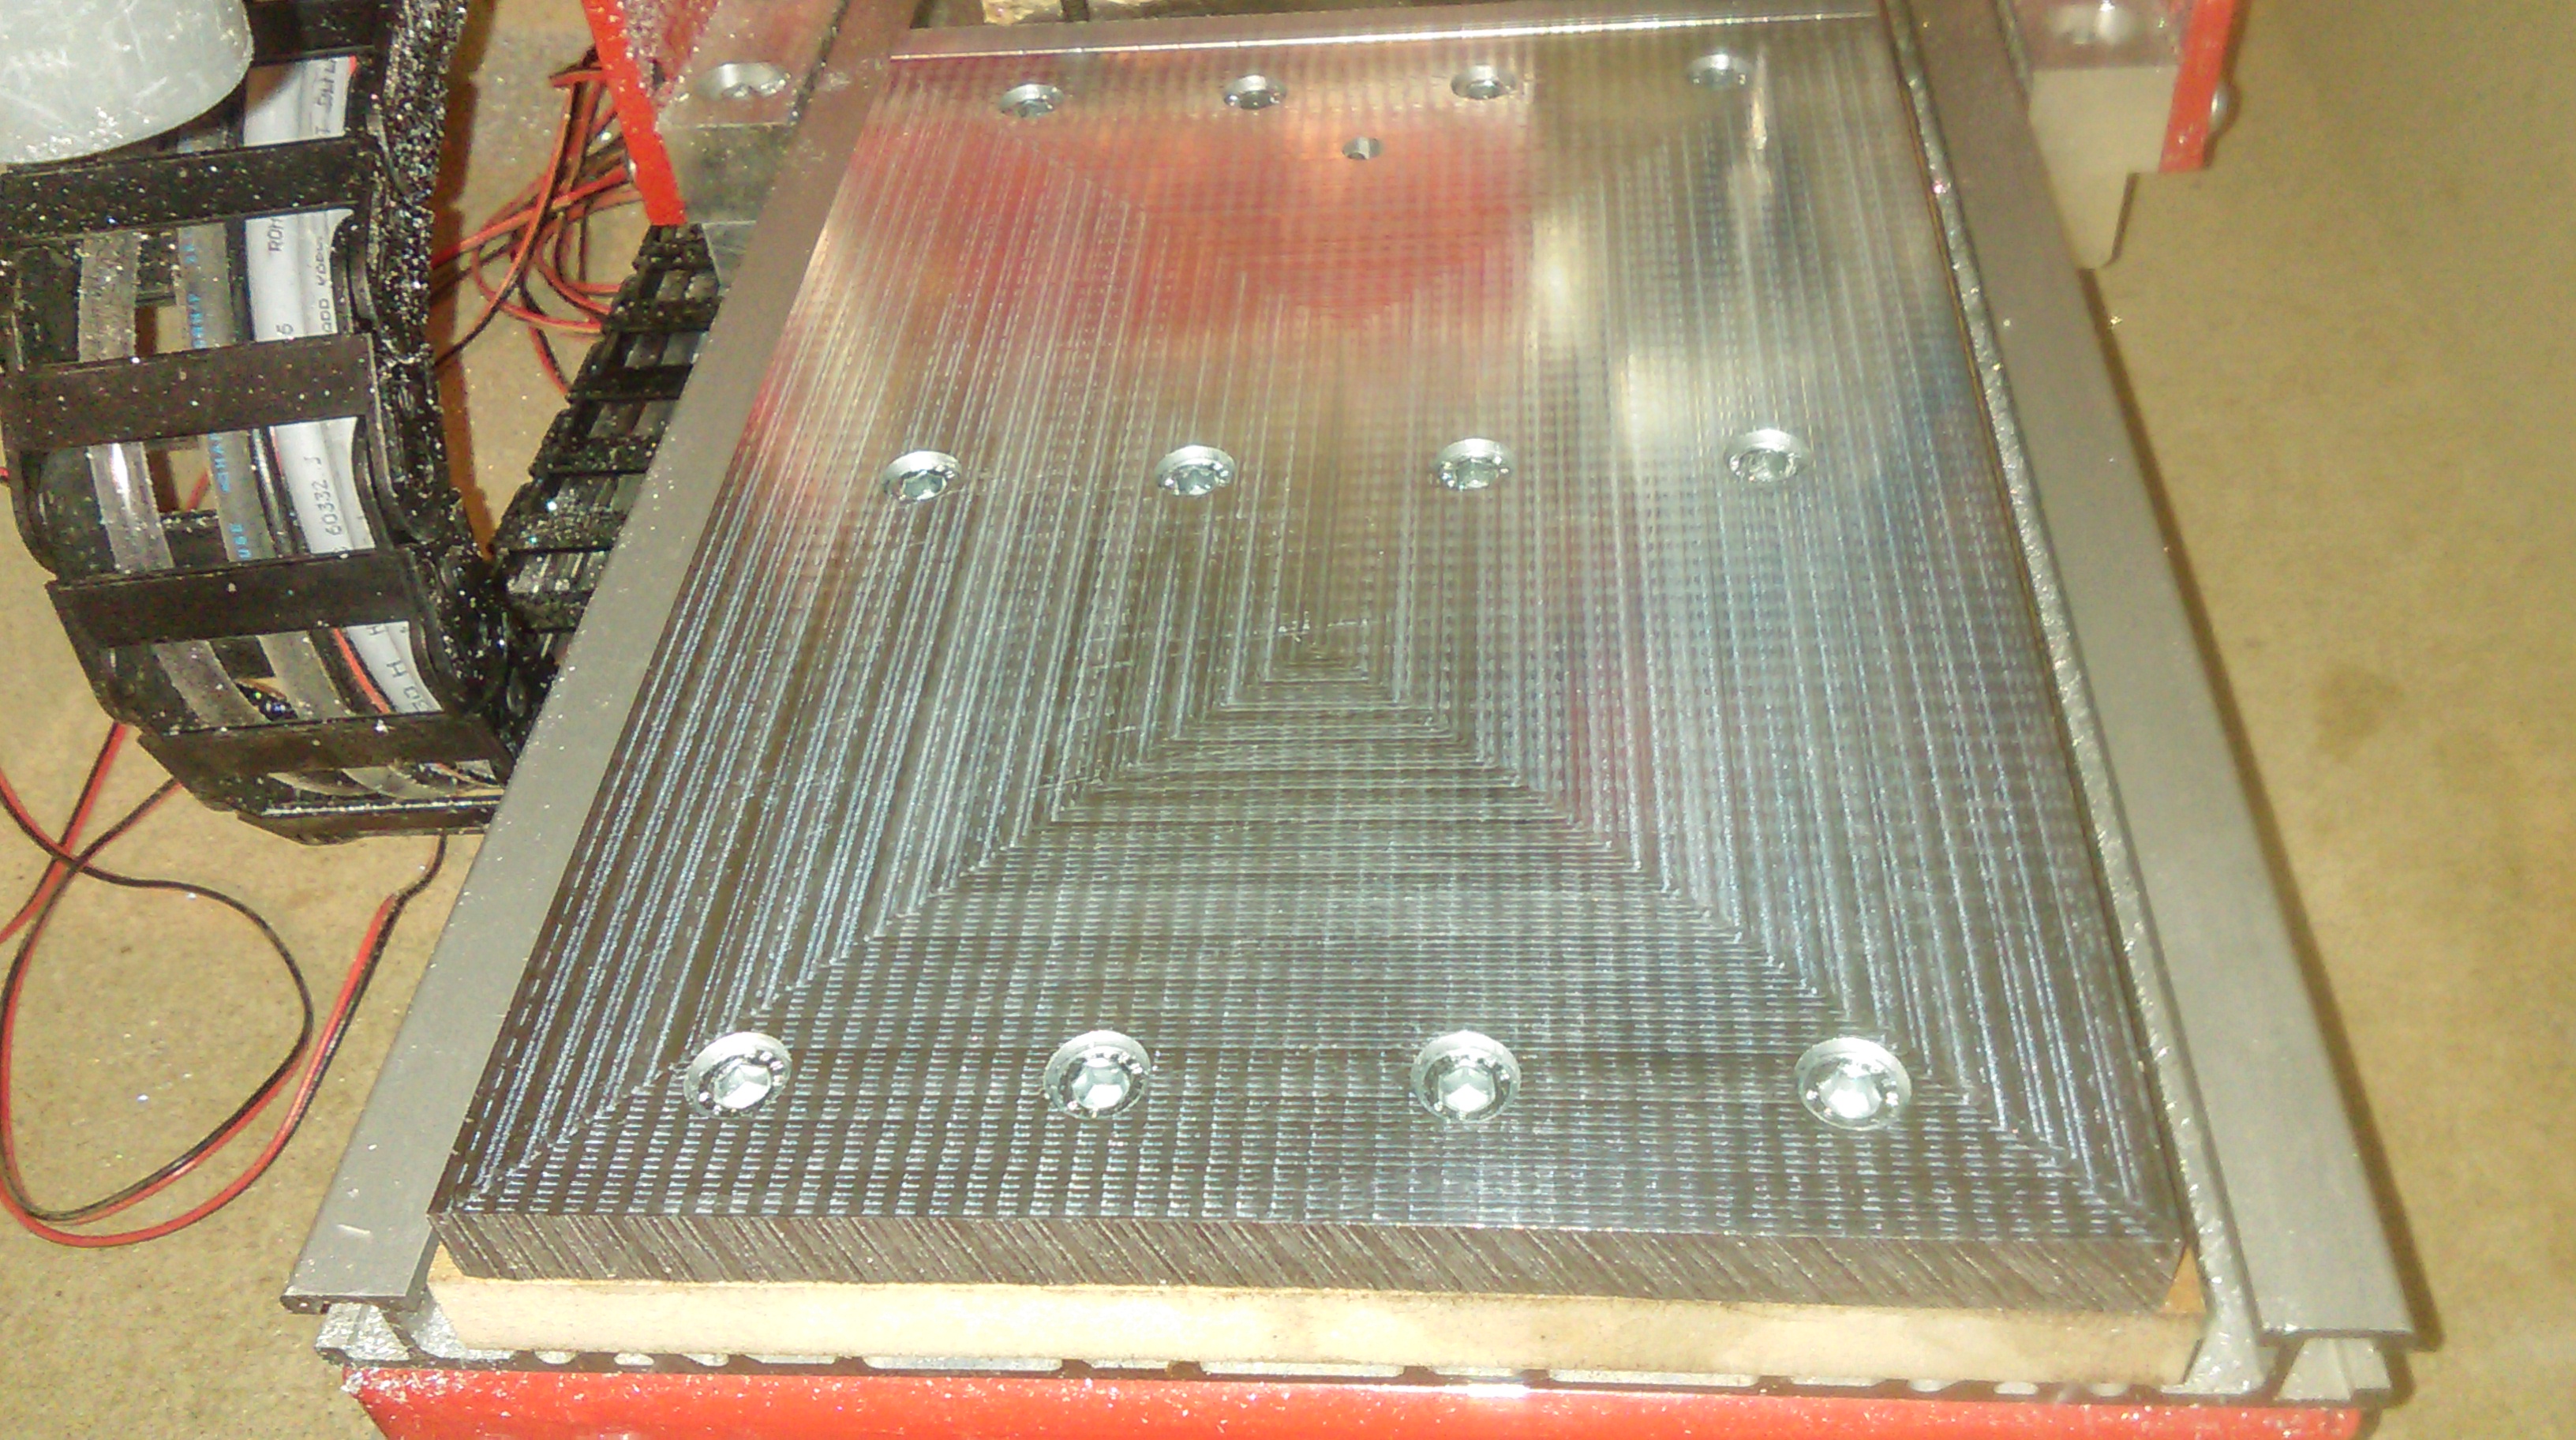
Then we finished the table by milling the actual grooves that will hold out rubber cord. The pictures below show the end result. The depth of the grooves should be slightly less than the diameter of the cord. We use a soft rubber cord with 2mm diameter, so the grooves are 1.7mm deep. You can notice a small hole in the middle-top part of the DIY vacuum table. This is the air outlet, that is connected to the hole we drilled at the beginning.
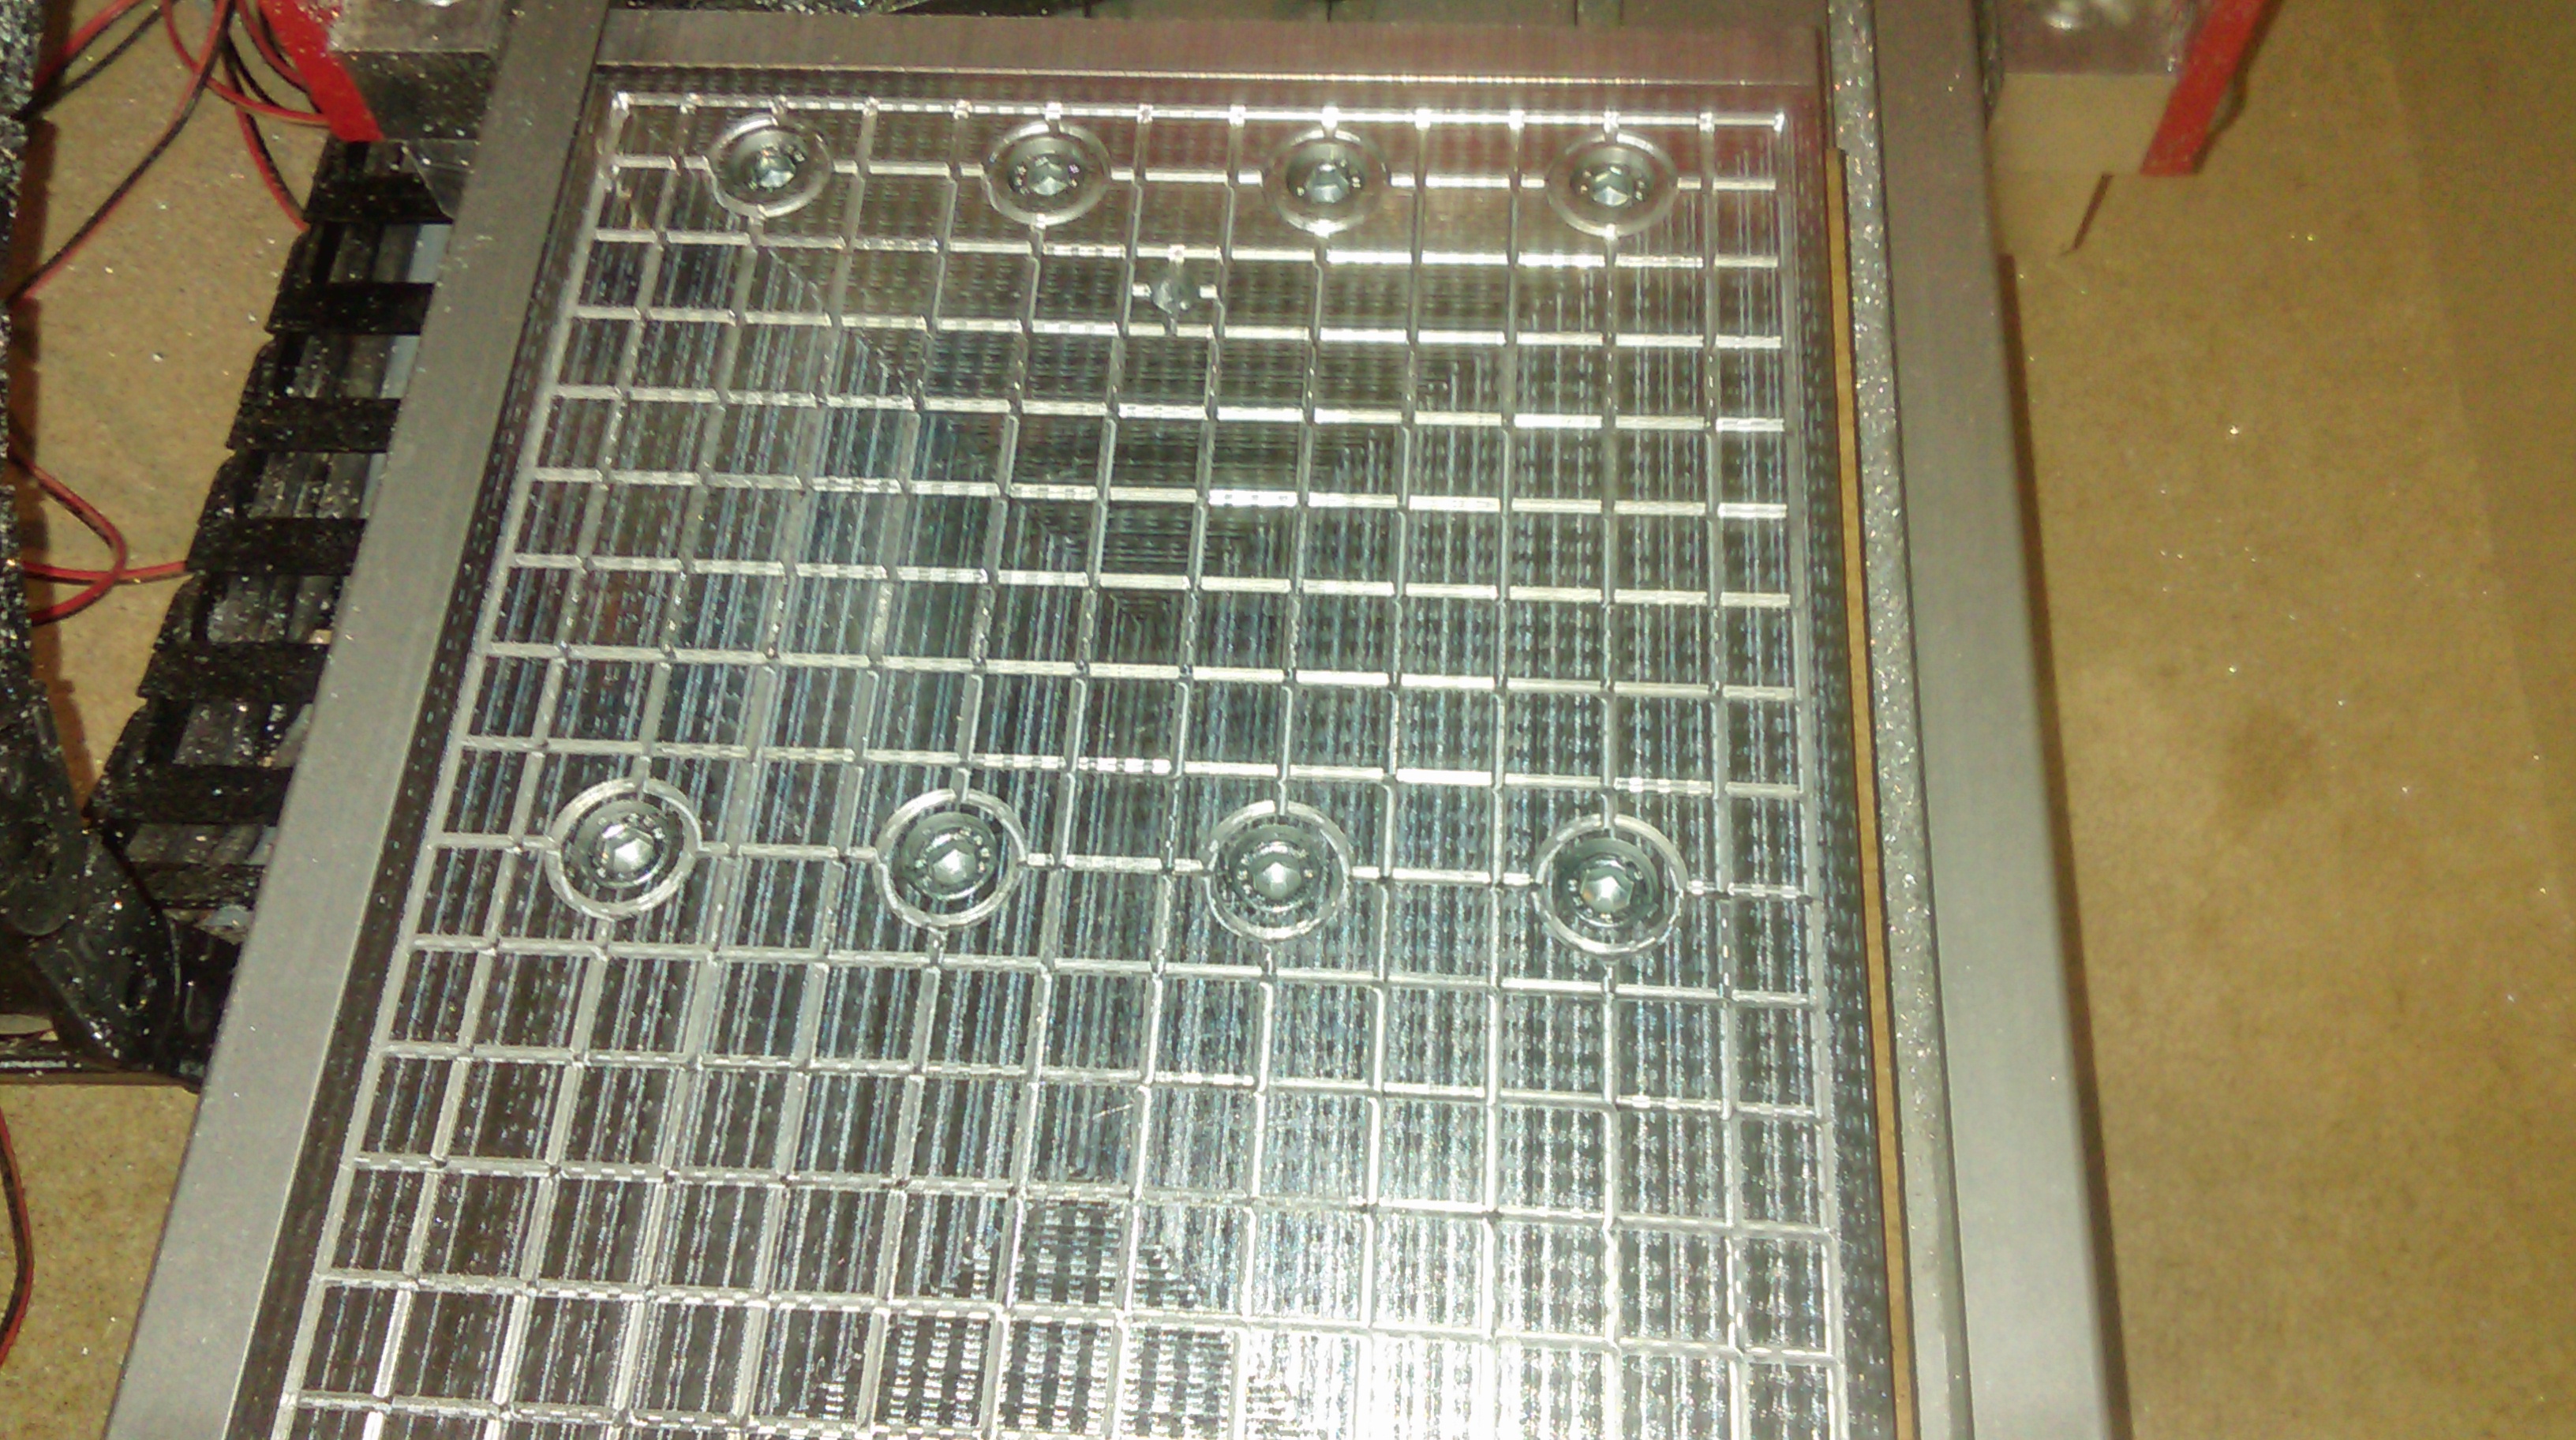
By completing these few simple steps we have made a perfectly good vacuum table that works and is straight relative to our CNC machine. We later added a few additional threaded holes so we could also clamp smaller pieces.
You can download files for this table here: ALU_vacuum_table [984 KB]
Please check also our latest blog posts and products. It can help you to improve your machines or get some ideas on how to even make them better.
- Bipolar stepper motor driver – PoStep25-256
- PCB tester – PoStep 25-256
- plasma cutter troubleshooting guide
- Torch height controller
- Homing sensor
- plasma voltage divider
Related Posts