This blog post will present an approach to implementing unique problem solutions that surpass the existing PoKeys device functionality.
Although, PoKeys devices offer unparalleled configuration possibilities, some problems require unique approaches that are not possible with the PoKeys configuration software.
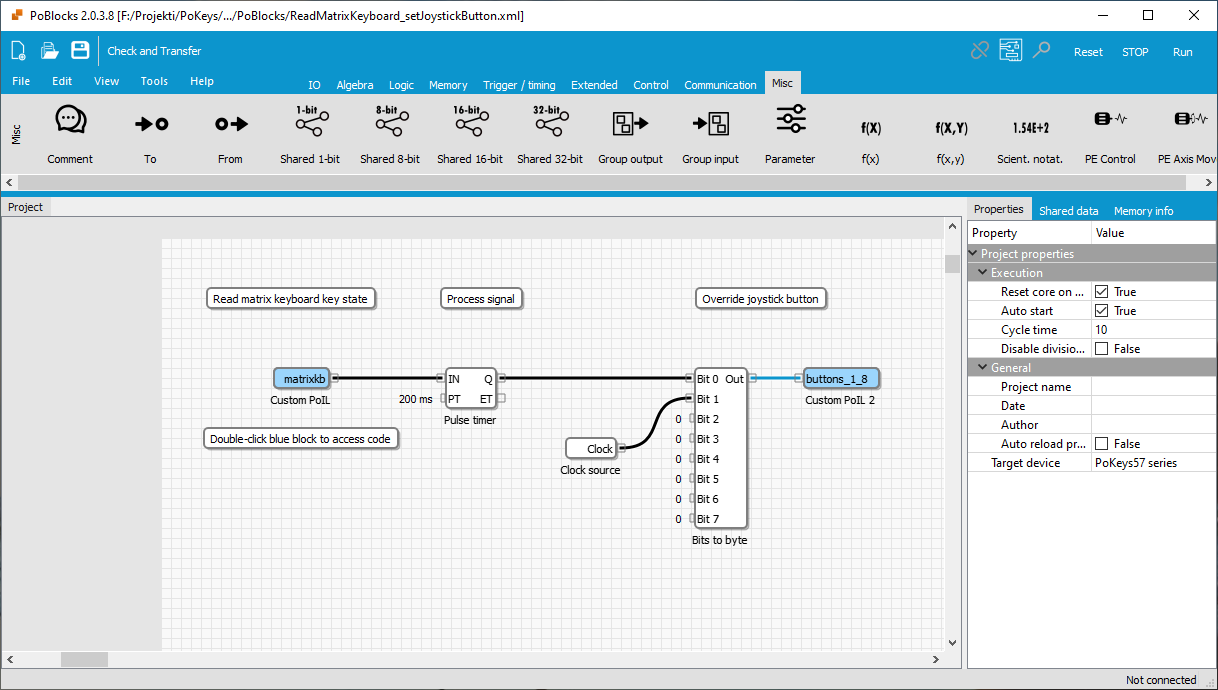
The example below will be basic, but will present the approach that is new to most of the PoKeys users. We will be using our free graphical programming tool PoBlocks to implement a way to trigger a joystick button of a PoKeys USB device using one of the matrix keyboard buttons. Moreover, we want each activation of the matrix keyboard button to produce a 200 ms long pressof a USB joystick button.
The example project is attached to this post – see download link below.
PoBlocks solution
PoBlocks by itself already features support for many of the PoKeys device functions, but some functionality is not implemented as a ready to use graphical blocks. In such cases, one can use the ‘Custom PoIL’ block that allows the user to insert the custom code into the project. The programming language used is called PoIL code and it is described in the PoIL.pdf document in the PoKeys installation folder.
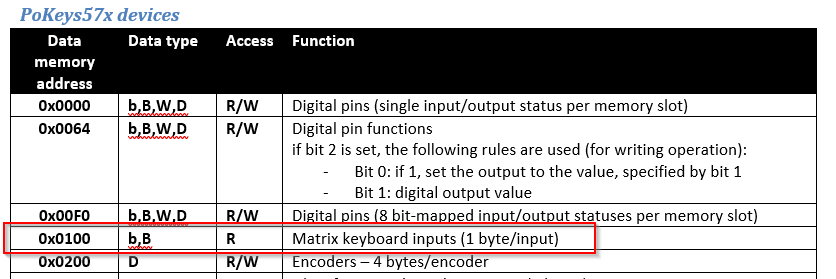
For the target solution, we need to read the information on the matrix keyboard status, which is found at the data memory address of 0x0100 and there is 1 byte reserved for each matrix keyboard key (bytes 1-8 for row 1, bytes 9-16 for row 2, etc.).
In PoBlocks, new Custom PoIL block is created and the following code is used (blocks with blue background in PoBlocks have additional options that are accessed by double-click, so double-click to edit the code).
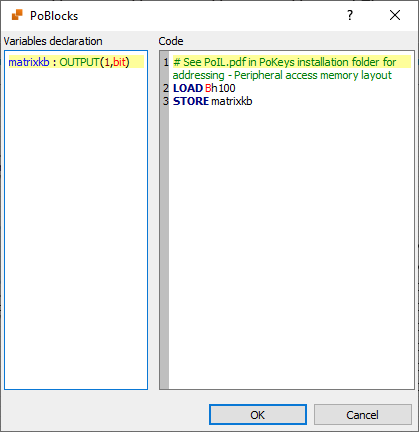
We access the location 0x0100 (which corresponds to matrix keyboard button A1) and store its value to the output variable ‘matrixkb’, which is shown as the block’s output.
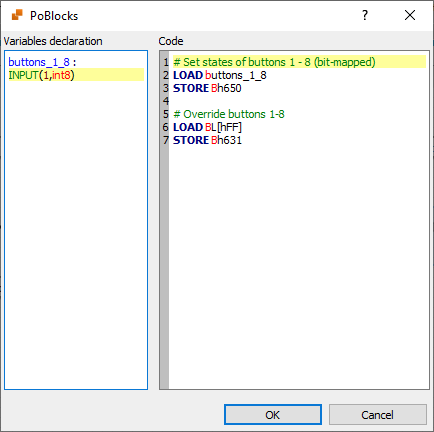
Similarly, to override the USB Joystick button state, one must use the following

We must first set the override value and this time, each button is bit-mapped to one of the bits at the target location. To tell the PoKeys device to use the value from this address instead of the button mapping configuration, the joystick button override bit must be set. This is done with the code shown below, which overrides joystick buttons 1 to 8.
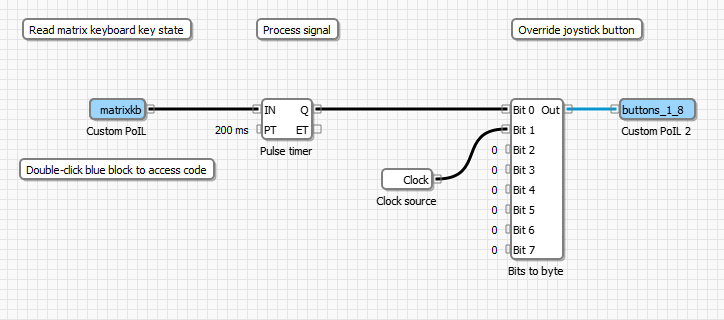
When connected together, matrix keyboard button state is connected to a Pulse timer (with period set to 200 ms) and the output of the timer is connected to ‘Bit 0’ input of the ‘Bits to byte’ block, output of which is then connected to joystick button override custom code. Additional clock source signal is added to Bit 1 input and produces a 1 Hz simulated activation of the joystick button 2.
To execute the code in the device, simply click ‘Check and transfer’ button on the top of the PoBlocks window, select PoKeys device (if the device does not have PoIL core enabled, enable it in theConnect to device dialog by clicking ‘Enable/disable) and click ‘Connect’. Switch PoKeys PoIL engine state to ‘Run’ by clicking the ‘Run’ button, indicated below.
One can also debug the operation of the logic in the Monitor mode. Click ‘Monitor mode’ button also indicated below and observe the color indications on the block connections.
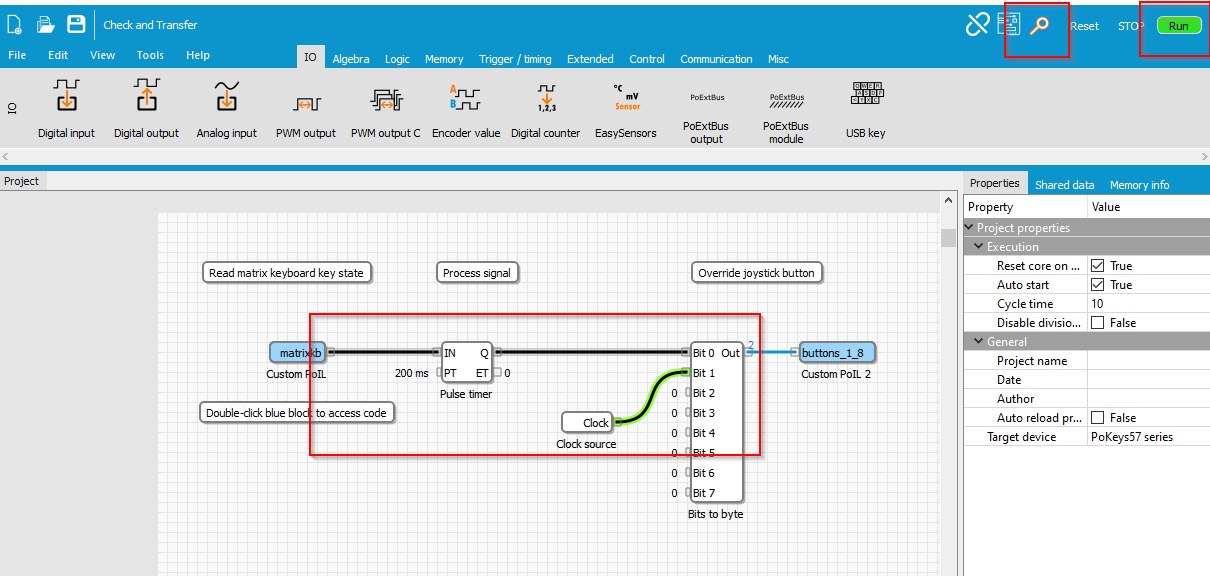
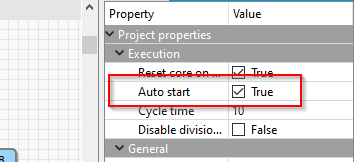
If the ‘Auto start’ option of the project is set, the code will automatically start when the device is powered on.
Related Posts