This article will show you how to record and export data captured with USB oscilloscope PoScopeMega1.
To follow this tutorial we need to meet requirements below:
- we need PoScope Mega1 device. If you don’t have it you can buy it here.
- we need PC with pre-installed Windows operating system (XP, Vista, 7, 8, 10)
- we need to download and install latest PC oscilloscope software PoScope4 (when writting this article the most recent version was 2.5). Click here to download it.
- we need to plug PoScopeMega1 to USB port
Here is short video about how to install PoScope4
When all requirements are fullfiled and installation process succeed we can start with the tutorial.
Record and export data
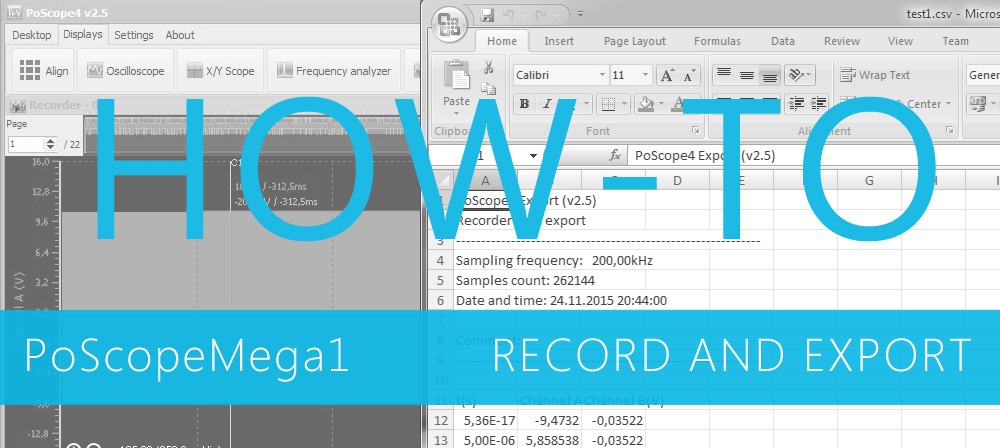
To record and export data with PoScope4 is really simple. In first step we run PoScope4 and open Recorder display by clickin on the Recorder icon as on image below.

Before we start recording we usually have to set up device to match the voltage divider and sampling frequency. Note that PoScopeMega1 can record up to the 200kS/s sampling frequency. Adjust the parameters for your own case. To open the GUI for PoScopeMega1 device click on the PoScopeMega1 button in the left bottom corner.

When you are satisfied with settings close or move PoScopeMega1 GUI away. In next step press the Record button on Recorder display (red dot icon). Settings window will pop up. You can set folder, file type, file name and comments for the destination file. File type can be PoScope4 native file or PCM (pulse-coded modulated) file. Note that PCM supports only 16 bit data format, therfore all float values are represented as 16 bit integer values. This format is useful when recording sound and when you don’t need such accuracy. In our case we will stick with PoScope4 recorder file type. Type your choices in and press OK button. If everything is set fine recording process will begin.


When you recorded data you were interested in press record button again to stop recording process. Recorder will stop recording and recorded data is now stored in file you specified. Now let’s open recorded data. Click on recorder display source device (PoScopMega1) to open menu which gives some options for source data for recorder and click on Open file.

Search for the file you recorded and select it. Recorder will open the file and switch to player mode. Major difference you’ll notice will be that in player mode overview bar and page selector are added to the top of the chart. Overview shows current content of the complete buffer. Yellow rectangle around the overview shows which part of that buffer is shown on the recorder chart below. You can modify overview’s yellow rectangle with mouse scroller (resize) and you can move it by simply dragging it arround. Data in file is organised in pages and page selector left to the overview bar let’s you choose which page from the file to load into recorder.

Now let’s export loaded data for further analysis. Click on the Export button on the Recorder display and Export toolbar will popup. You can select which channel to export and range. If you select Selected range then only data surrounded with yellow rectangle on the overview above will be exported. If you select Complete file then all data (all pages) will be exported. Make your selection and click on Export button located on the right.

Save dialog will popup and you will be able to select among few different formats. For our tutorial we will export to CSV format.

Note that export process can take some time to complete. Be patient, please.

When export is finished we can use exported file in any third-party software for further analysis. Just as an example let’s open our exported file in MS Excel. File format is CSV and Excel can import it easily. This is true for any other software as long it supports import of selected file format.

As you can see record and export data with PoScope4 is simple and everyone can do that. We hope this tutorial delivered enough informations about how to do that. If there are still questions you are welcome to ask it on our support web page here.
Please check also some of our products for building CNC machines, making automation or DIY projects.
- Bipolar stepper motor driver – PoStep25-256
- Plasma voltage divider
- PCB tester – PoStep25-256
- Plasma cutter troubleshooting guide
- Introduction to CNC hardware – electronics
Related Posts